

Painted cabinets are all the rage right now, especially when they are the accent of your room. Fusion Mineral Paint has such a wide range of colours that can be easy to update them with a neutral shade that brightens up your room or with a rich statement colour that draws the eye. This step-by-step will show you how to DIY your own Built-ins with Oak cabinets and Coal Black Fusion Mineral Paint.
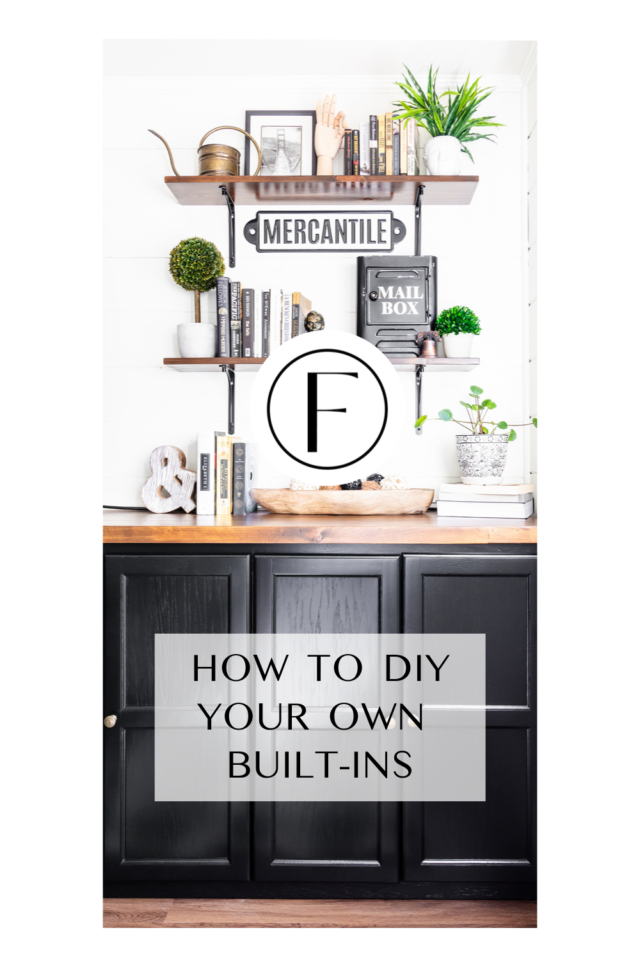
Since cabinets are mostly for storage, you can find them in the areas that are most commonly used like kitchens, bathrooms, living spaces, and workspaces. There are, however, those areas in your home that can be upcycled to serve new purposes like awkward nooks and closets that can be upcycled to be a mud area or bar. Creating new spaces in your home is a fun way to freshen up the area while providing some functional use. In this tutorial, we will show you how to create your own DIY built-ins using stock kitchen cabinets and Fusion products.
SUPPLIES NEEDED:
- Measuring Tape
- Wood Glue
- Nail Gun
- Painter’s Tape
- 1×4 Wood Planks
- 1×2 Wood Trim
- SFO Cappuccino
- Fusion TSP & Cleaning Rags
- Fusion Sanding Pads
- Microfiber Roller
- Staalmeester One Detail Brush
- Fusion Mineral Paint in Coal Black
Now that we have our supplies ready to go, let’s get started! The first step is to measure your area. You want to make sure that your cabinets will fit nicely in the area you are going to install them. This area we chose is just a long wall that is perfect for our built-ins.
For more information on how to prep your furniture for painting click here
STEP 1
ASSEMBLE THE CABINETS
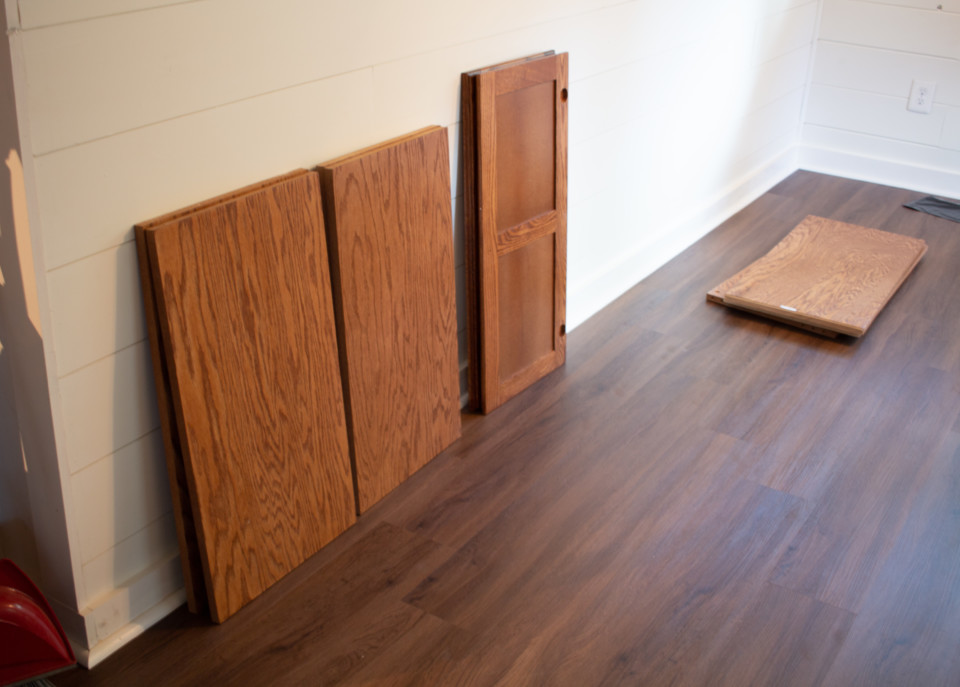
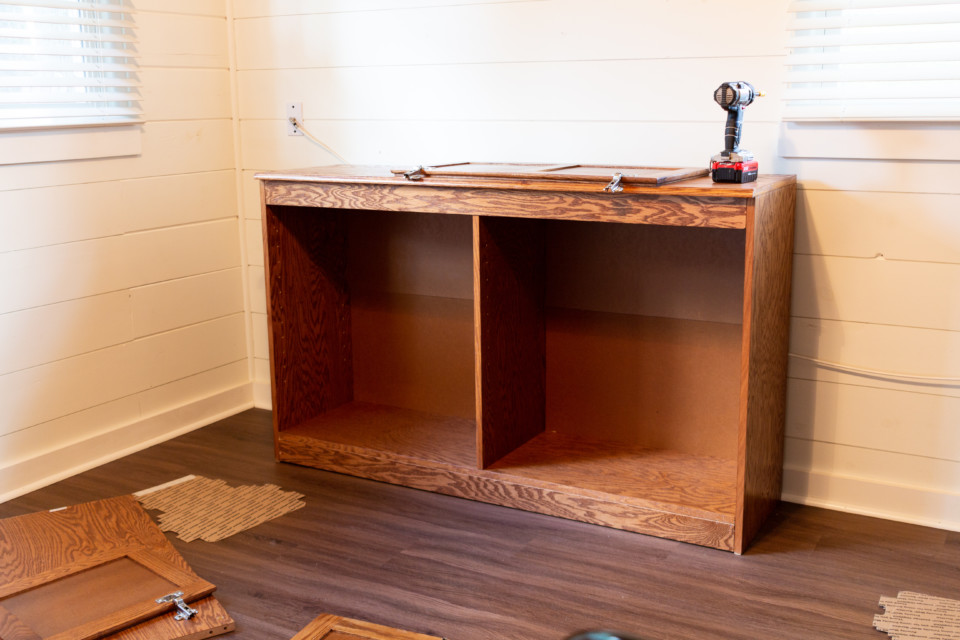
Custom cabinets can be quite expensive. The best way to get your DIY built-ins at an affordable price is to upcycle salvaged cabinets from recycle stores like Habitat for Humanity. Some thrift stores will also accept cabinets in great condition but most of the time they will be sold as a set. If you only need specific pieces, the next best thing is using stock cabinets and bookshelves you can get at great prices from places like Home Depot & Ikea. For this project, we used three-floor model cabinets from our local lumber store.
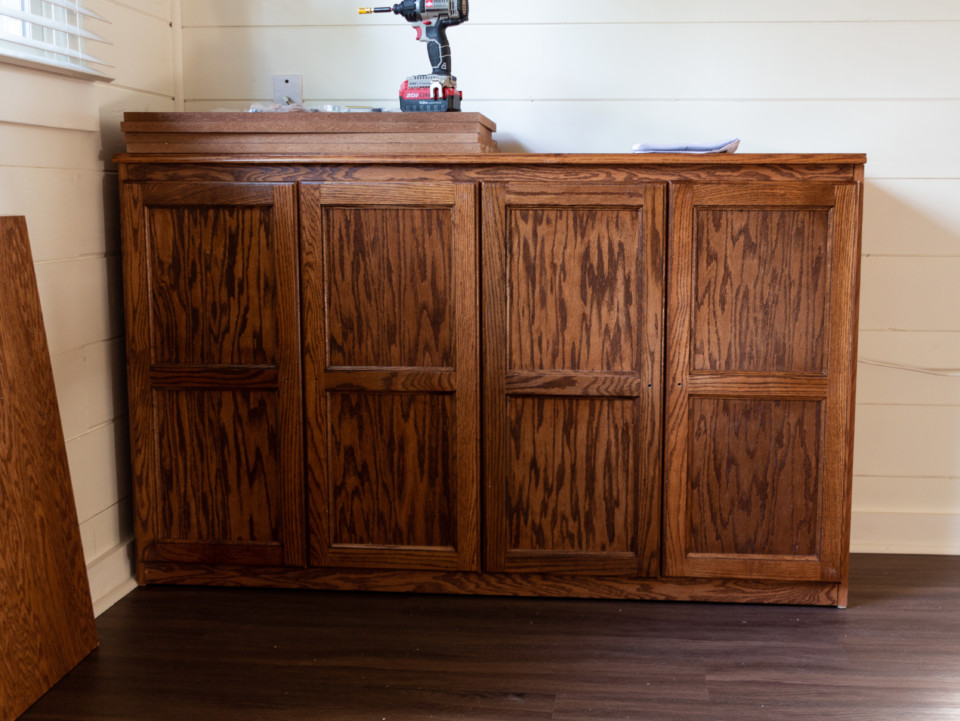
STEP 2
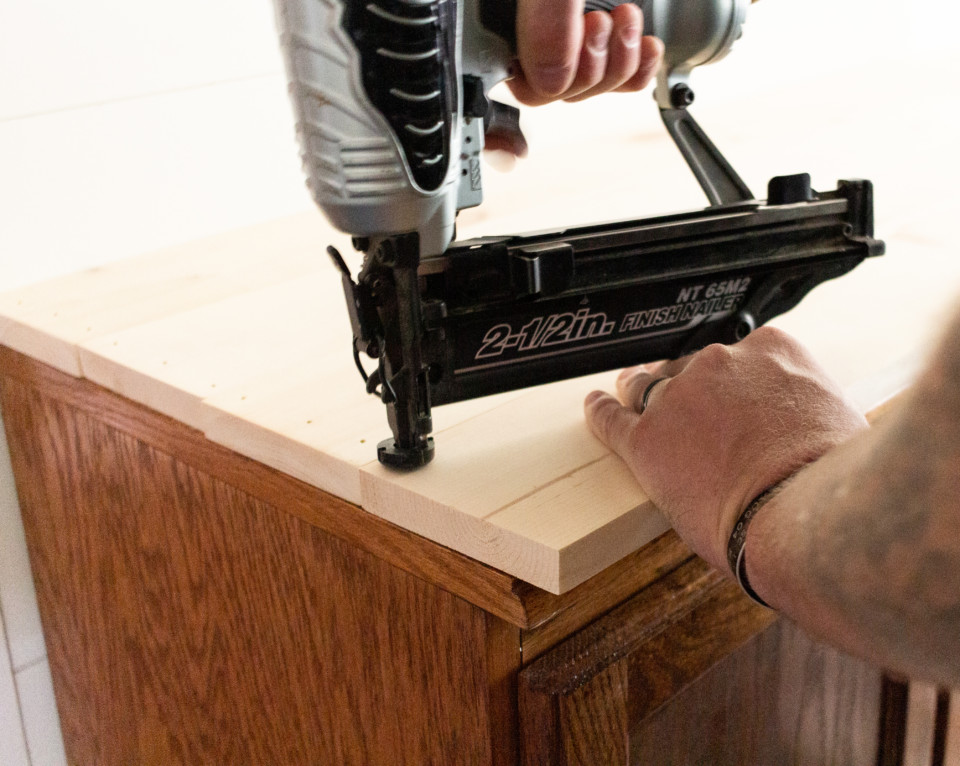
BUILD YOUR TOP
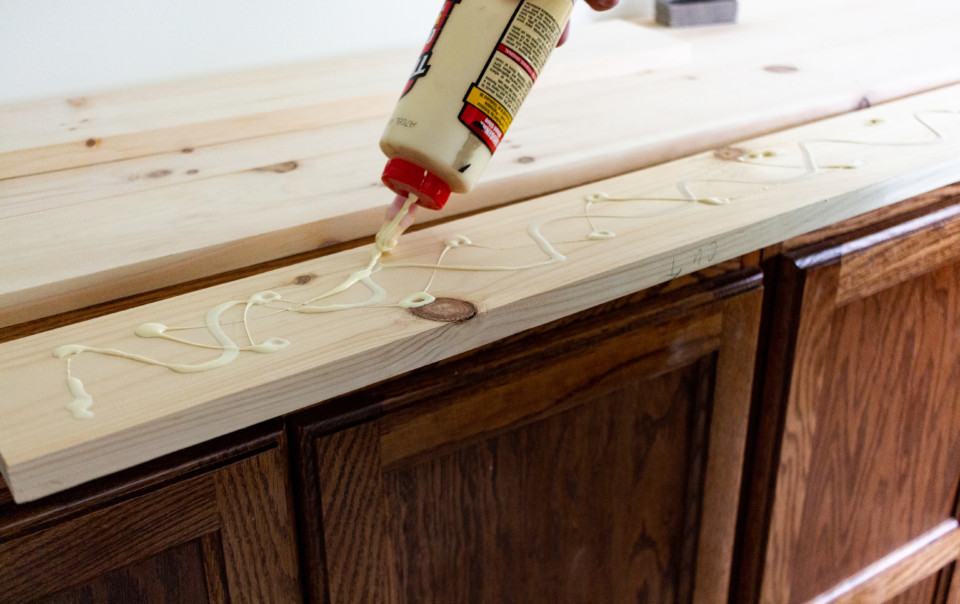
Now that you have your cabinets in place, can create your own custom top using 1×4 Planks of wood. Even though these cabinets already come fitted with a top, we wanted to create our own to hide the break between cabinets as well as add more of a rustic look.
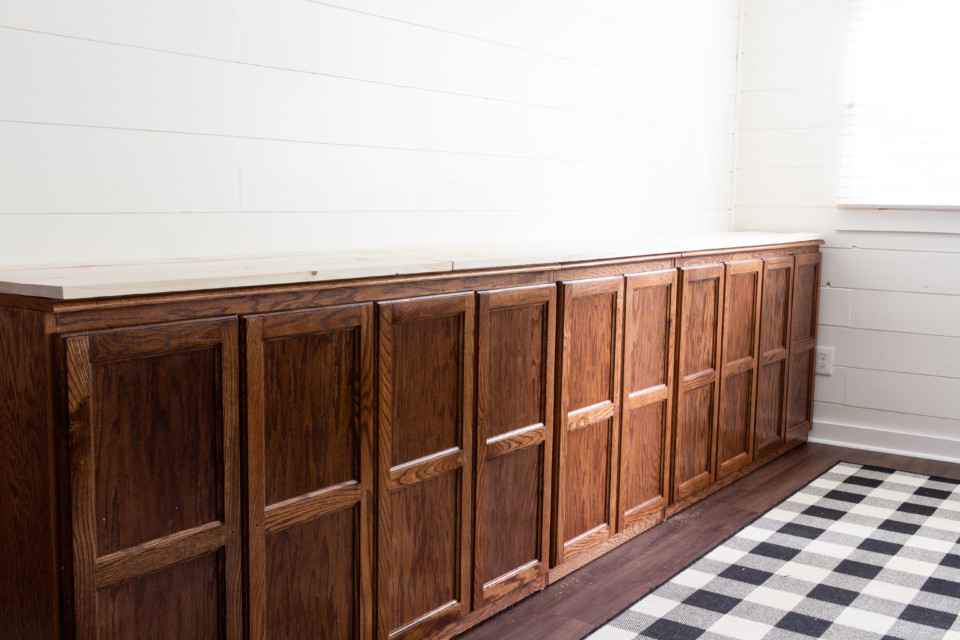
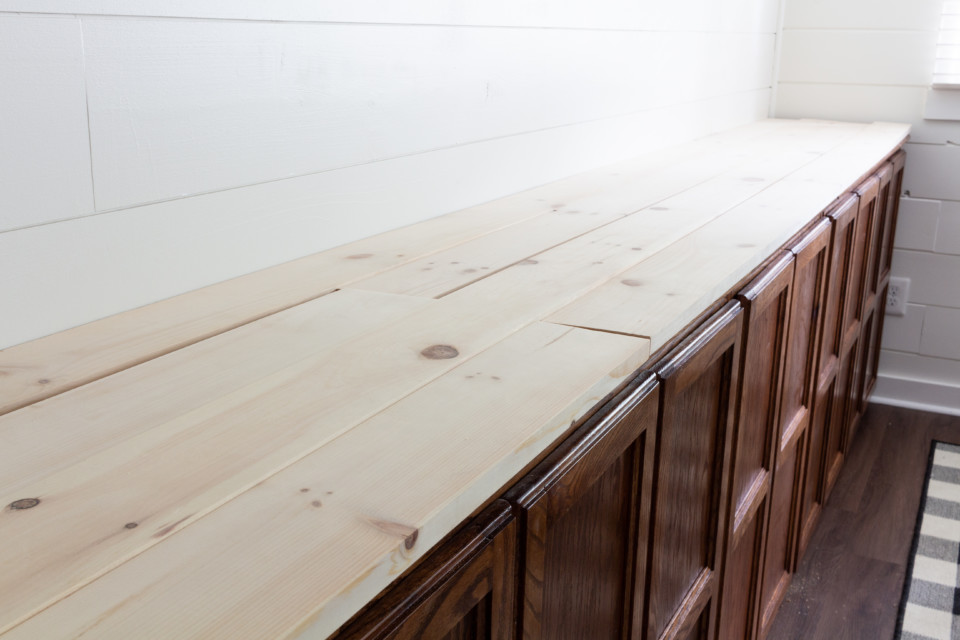
Cut your 1×4 pieces to size. Sand them down before they are in place to avoid creating a mess of dust in your home. You will want to stagger the seams for a more natural look. Once you get the look your desire, apply a heavy amount of wood glue to the bottoms. You will then need to nail the wood securely in place.
STEP 3
PREP THE CABINETS
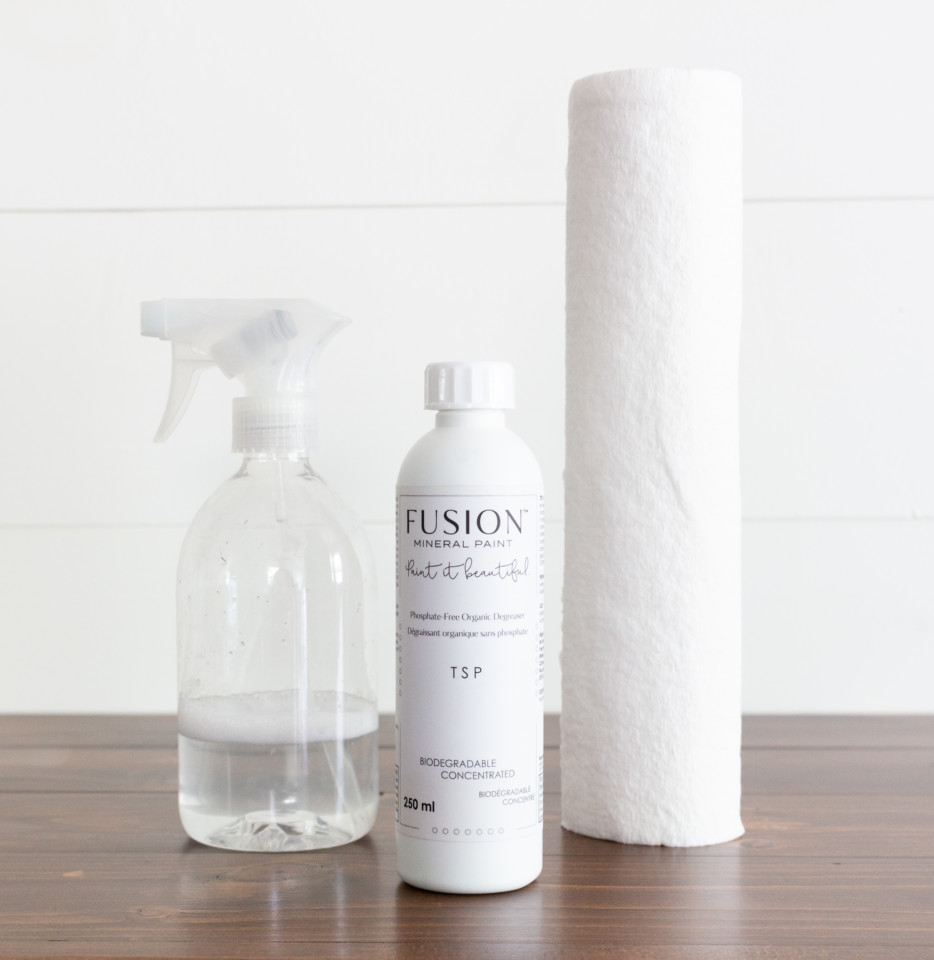
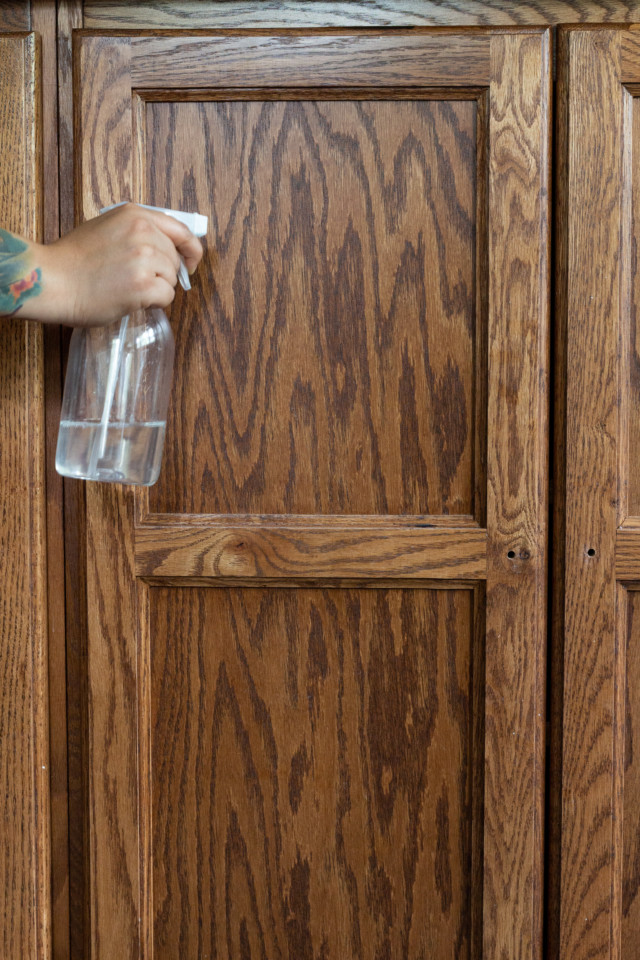
The next step is prep the base of the cabinets for paint. You will want to clean your cabinets first to remove any residue or gunk. You also want to make sure your base is clean before sanding to avoid pushing anything onto the surface and into the grain. We love using Fusion TSP for cleaning because it is a powerful non-toxic degreaser that cleans your surfaces thoroughly.
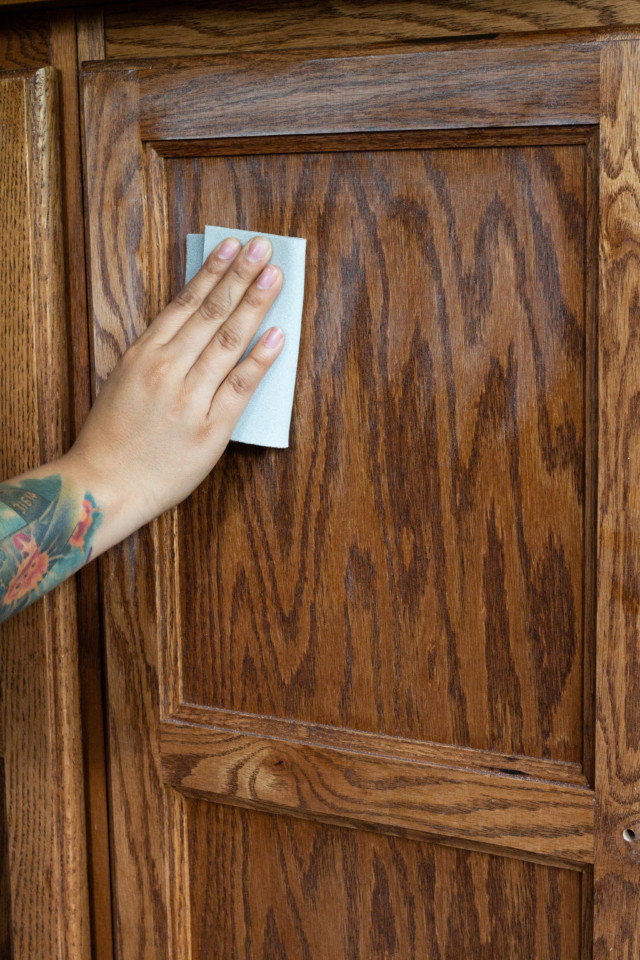
Now it’s time for scuff sand! Most finished cabinets from big box stores are usually finished with urethane or lacquer. We want to scuff sand the surface to allow Fusion to grip onto the surface and avoid any issues with adhesion. You can also use Fusion Ultra Grip if your cabinets are really glossy and shiny. Since these cabinets are oak, they are porous and grainy, so we just want to scuff up the surface for some tooth. Don’t forget to wipe away the dust!
STEP 4
PAINT THE CABINETS
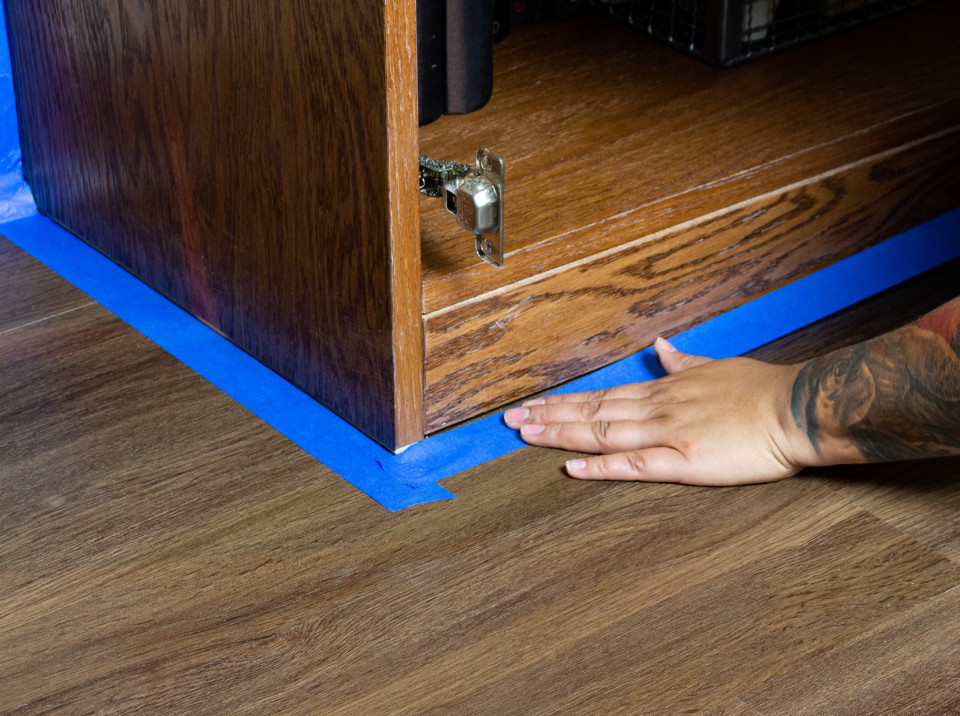
Let the transformation begin! But first, we need to tape off our surface. Using a painter’s tape will help protect your floors and walls from any paint that seeps through.
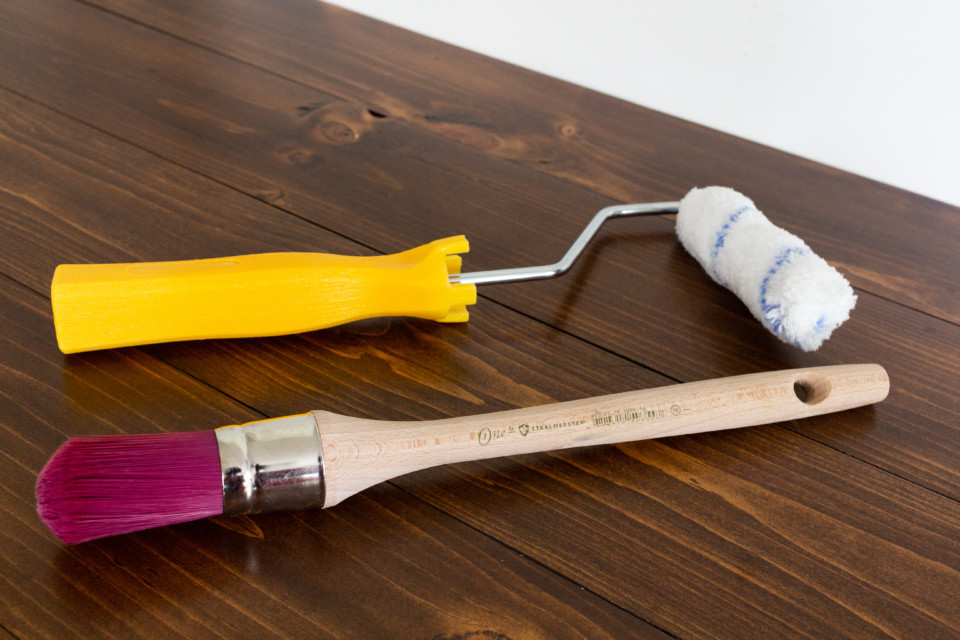
Now you’re ready to paint. The perfect tools for cabinets with inlays and details are the Fusion Microfiber Roller and a detail brush. The Staalmeester Pointed Sash and the Staalmeester One Brush are perfect for getting into the corners and grooves.
Coal Black
You want to begin by outlining the crevices and trim with your detail brush, this will help get the paint into places that your roller can’t reach. After that, you want to use your roller to paint the flat surfaces. Your roller will overlap with the areas you covered with the detail brush so don’t worry about texture patterns. Coal Black has great coverage.
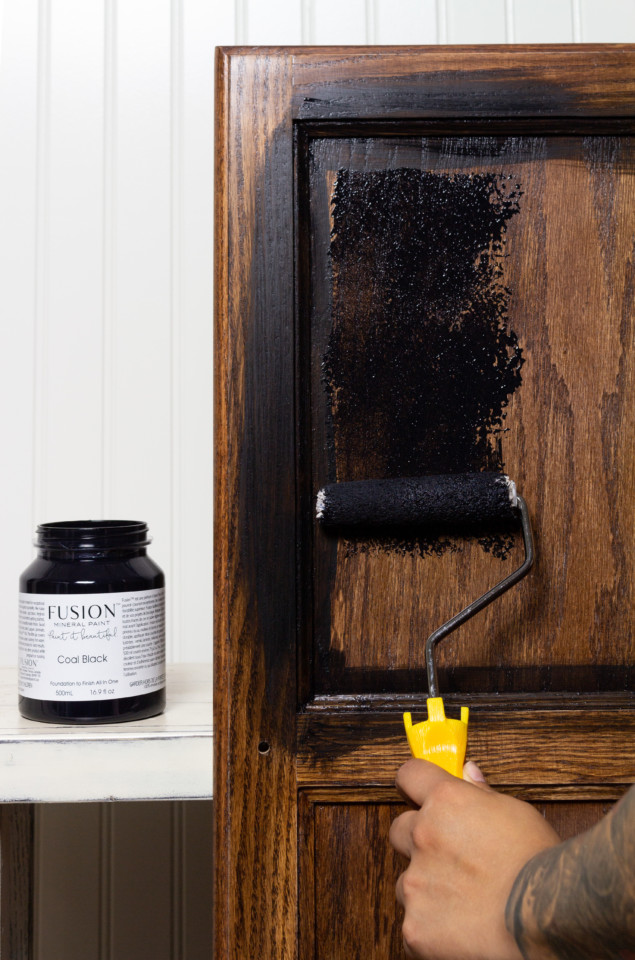
You will probably need 2-3 coats for lighter colors, and 1-2 coats for darker colors. Let dry for 12 hours between coats and 24 hours after your final coat before installing doors or use. The Stain and Finishing Oil in Cappuccino was used on the wooded top. Watch Jennylyn show you how to apply this to wood.
STEP 5
ENJOY YOUR PROJECT
Take a step back and enjoy your handy work! Not only did you save a ton of money but you also created functional storage and space for your area. A little hard work can go a long way when you have the creativity to create something on a blank canvas.
Click here to see > how to get a smooth paint finish
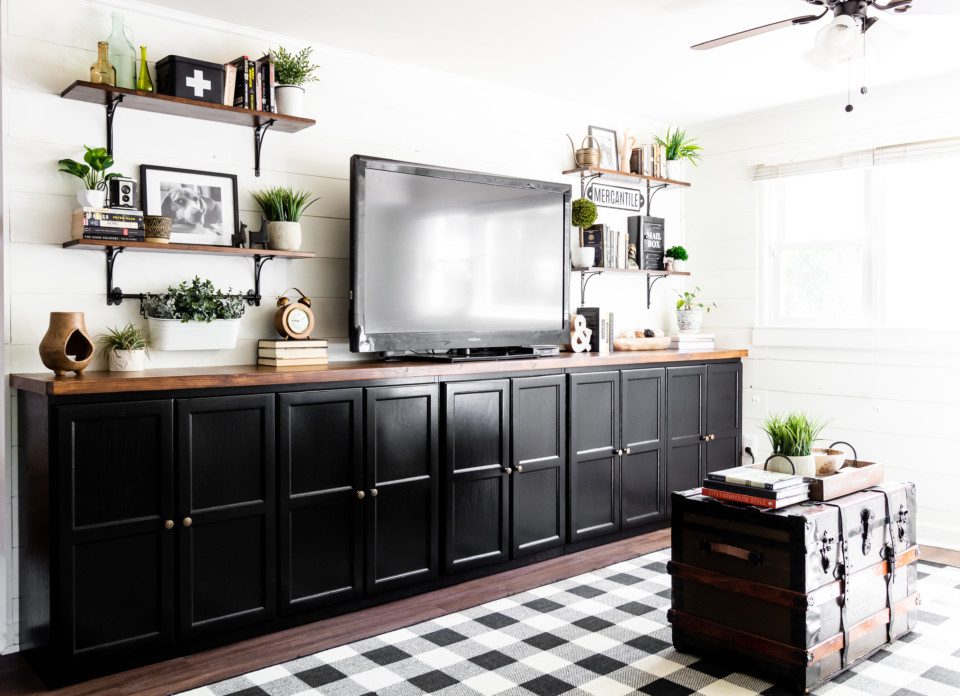
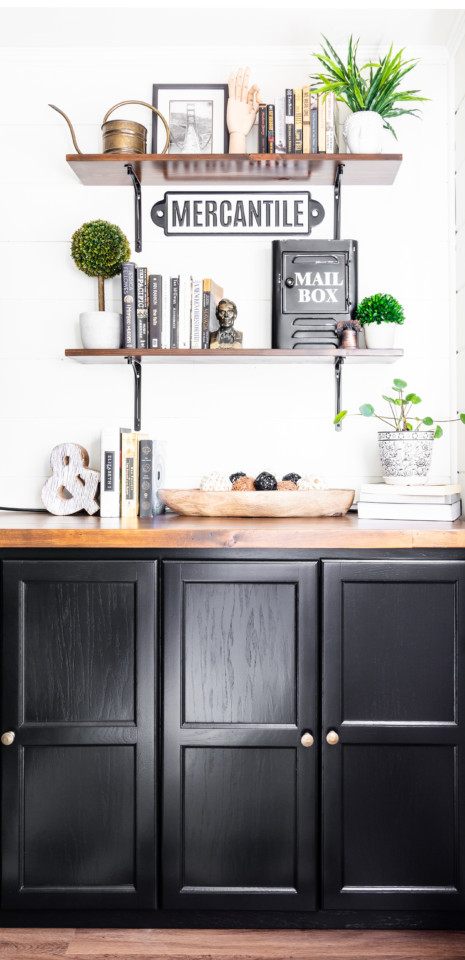
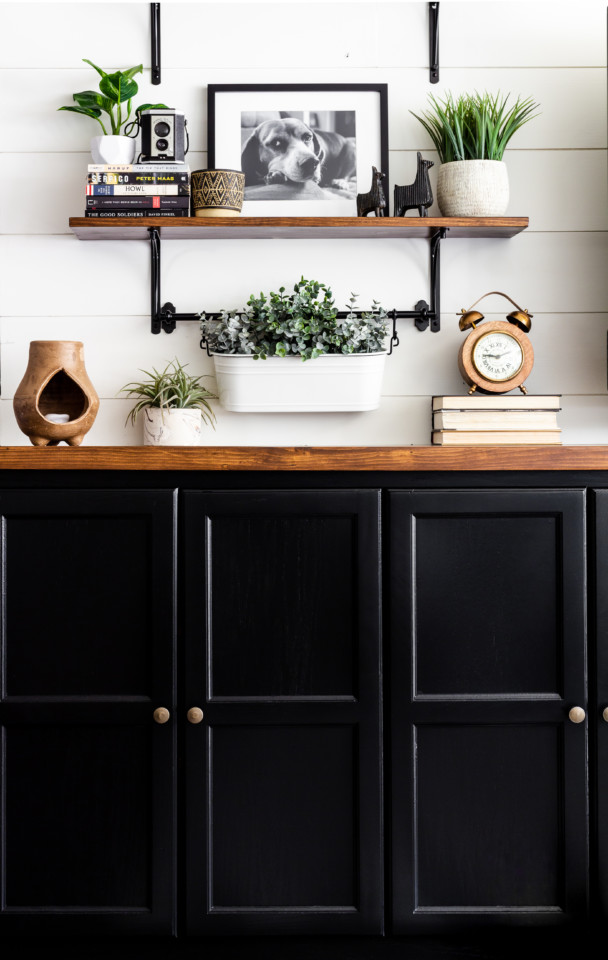
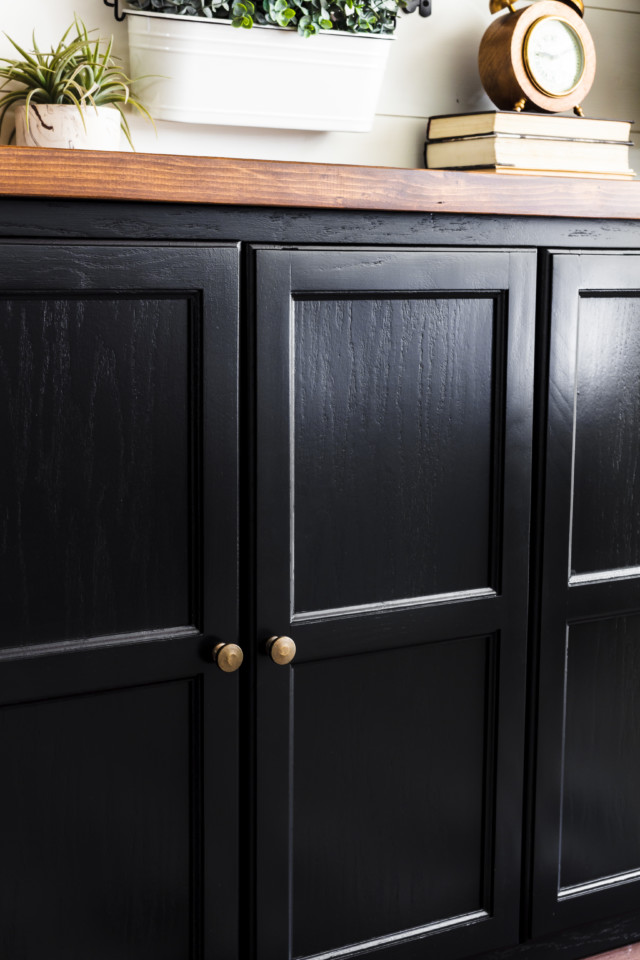
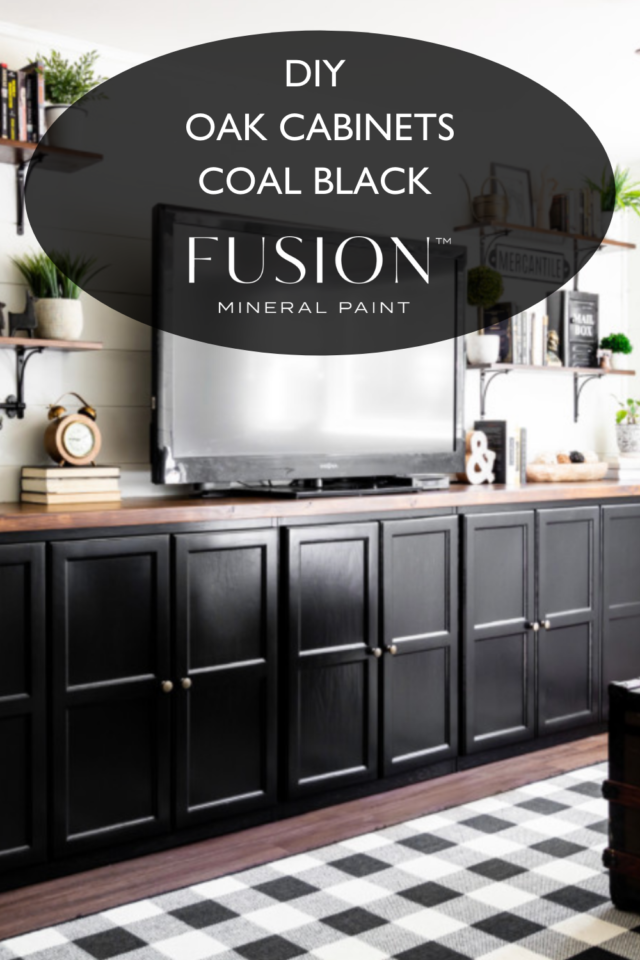
You can see how beautifully Coal Black Fusion Mineral Paint levels out. No brush strokes or roller texture, just the beautiful wood grain coming through to add to your rustic elements.
*Note: If you want to reduce the wood grain from showing, you can use grain fillers as a skim coat or BIN Shellac Primer in thick coats prior to painting. Just make sure to sand smooth before applying your paint.
Your rustic top also adds some warm earthy elements to your space and balances our the monochromatic color scheme we have going here.

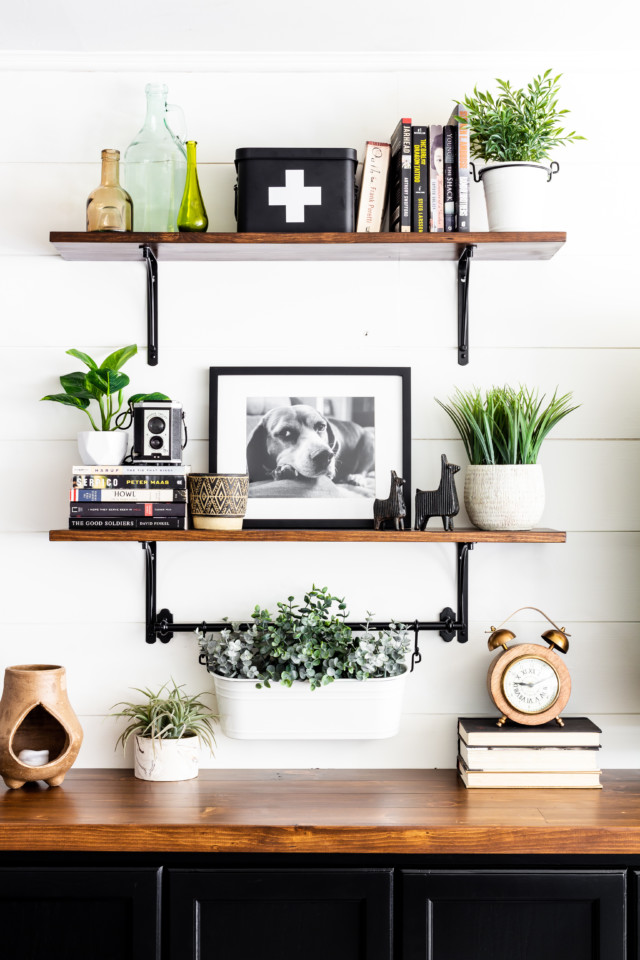
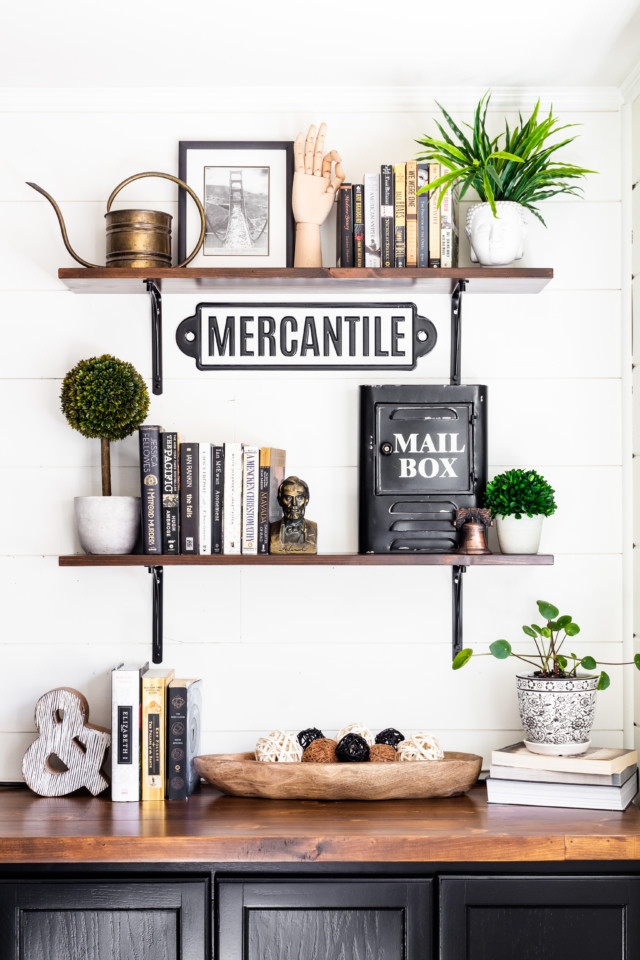
Adding some matching black and wood shelves is also a good way to tie in the wood and the paint colours, while adding even more functional space to display your books and décor.
Are you ready to tackle painting your own cabinets? Fusion products make transforming large spaces so simple and easy. All you need is a little bit of creativity!
Let us know if you have painted your cabinets over in our Facebook group Paint it Beautiful
Save this pin for later or see what other inspiration we have over on PINTEREST