Skip to content

SHOP LOCAL

SHOP ONLINE

    Search
    Please assign a menu to the primary menu location under Menus.
    Search
    START TYPING AND PRESS ENTER TO SEARCH
    • SHOP
      • PAINT
        • Shop All Paint
        • Alchemy Limestone & Chalk
        • Mineral Paint
        • Wall Paint
        • Metallic Paint
        • Milk Paint
        • Smooth Paint Water Mister
        • Colour Card & Fan Decks
      • Paint Kits
        • Alchemy Starter Kit
        • Paint Kit Bundle
        • Kitchen Cabinet Refinishing Kit for Light Colours
        • Kitchen Cabinet Refinishing Kit for colours
        • Jennylyn’s Essential Paint Tool Kit
        • Milk Paint Value Kit – Tester Bundle
        • Milk Paint Value Kit – Large Bag Bundle
        • Milk Paint Starter Kit
        • Metallic Tester Gift Set
      • Other Kits
        • Prep Kit
        • Finishing Kit Sampler Pack
        • Staalmeester – Essential Brush Set
        • Staalmeester® ProHybrid Series Gift Box
        • Staalmeester Rollers Set #1
        • Staalmeester Rollers Set #2
        • Staalmeester Rollers Set #3
        • Self-Care Kit for Painters
      • ACCESSORIES
        • All Accessories
        • Brushes
        • Rollers
        • Brush Soap
        • Paint Extender
        • Applicator Pads
        • Sanding Sponges & Pads
        • Tough Coat Applicator Sponge
        • Beeswax Distressing Block
        • Paint Trays
        • Whisk
      • ACCENTS
        • All Accents
        • Glaze
        • Crackled Texture
        • Decoupage & Transfer Gel
        • Fresco Texturizing Powder
        • Smooth Embossing Paste
        • Pouring Resin
        • Cell Enhancer
      • FINISH
        • All Finishes
        • Tough Coat
        • Stain & Finishing Oil
        • Furniture Waxes
        • Beeswax Finish
        • Hemp Oil
        • Gel Stain & Top Coat
        • Tung Oil
        • Salad Bowl Finish
      • PREP
        • ALL PREP
        • TSP Alternative
        • Odourless Solvent
        • Ultra Grip
        • Transition
      • SWAG
        • All Swag
        • Bracelets
        • T-Shirts
        • Aprons
        • Self-Care
        • Travel Mugs
        • Social Media Guide
    • Colours
      • All Paint
      • Alchemy Limestone & Chalk
      • MINERAL PAINT
      • WALL PAINT
      • METALLIC PAINT
      • MILK PAINT KITS
      • SMOOTH PAINT WATER MISTER
      • COLOUR CARD & FAN DECKS
    • Inspiration
    • Learn
      • Prep
      • Apply
      • Top Coats
      • Choose A Brush
      • Techniques + Tips
    • About
      • Meet the Creator
      • Become a Retailer
      • Become an Affiliate
    logo 1
    • Shop

      Paint

      • All Paint
      • ALCHEMY LIMESTONE & CHALK
      • MINERAL PAINT
      • METALLIC PAINT
      • MILK PAINT
      • SMOOTH PAINT WATER MISTER
      • COLOUR CARD & FAN DECKS
      • All Paint
      • ALCHEMY LIMESTONE & CHALK
      • MINERAL PAINT
      • METALLIC PAINT
      • MILK PAINT
      • SMOOTH PAINT WATER MISTER
      • COLOUR CARD & FAN DECKS

      Paint Kits

      • All Kits
      • Alchemy Starter Kit
      • Paint Kit Bundle
      • Kitchen Cabinet Refinishing Kits
      • Milk Paint Kits
      • Gifts
      • All Kits
      • Alchemy Starter Kit
      • Paint Kit Bundle
      • Kitchen Cabinet Refinishing Kits
      • Milk Paint Kits
      • Gifts

      ACCESSORIES

      • ALL ACCESSORIES
      • BRUSHES
      • ROLLERS
      • SCRAPERS
      • BRUSH SOAP
      • PAINT EXTENDER
      • APPLICATOR PADS
      • SANDING SPONGES & PADS
      • TOUGH COAT APPLICATOR SPONGE
      • BEESWAX DISTRESSING BLOCK
      • PAINT TRAYS
      • WHISK
      • ALL ACCESSORIES
      • BRUSHES
      • ROLLERS
      • SCRAPERS
      • BRUSH SOAP
      • PAINT EXTENDER
      • APPLICATOR PADS
      • SANDING SPONGES & PADS
      • TOUGH COAT APPLICATOR SPONGE
      • BEESWAX DISTRESSING BLOCK
      • PAINT TRAYS
      • WHISK

      Other Kits

      • All Kits
      • Brush & Roller Kits
      • Prep Kit
      • Finishing Kit Sampler
      • Self-Care Kit for Painters
      • All Kits
      • Brush & Roller Kits
      • Prep Kit
      • Finishing Kit Sampler
      • Self-Care Kit for Painters

      ACCENTS

      • ALL ACCENTS
      • GLAZE
      • CRACKLED TEXTURE
      • DECOUPAGE & TRANSFER GEL
      • FRESCO TEXTURIZING POWDER
      • SMOOTH EMBOSSING PASTE
      • POURING RESIN
      • CELL ENHANCER
      • ALL ACCENTS
      • GLAZE
      • CRACKLED TEXTURE
      • DECOUPAGE & TRANSFER GEL
      • FRESCO TEXTURIZING POWDER
      • SMOOTH EMBOSSING PASTE
      • POURING RESIN
      • CELL ENHANCER

      FINISH

      • ALL FINISHES
      • ULTRA GUARD
      • TOUGH COAT
      • STAIN & FINISHING OIL
      • FURNITURE WAXES
      • BEESWAX FINISH
      • HEMP OIL
      • GEL STAIN & TOP COAT
      • TUNG OIL
      • ALL FINISHES
      • ULTRA GUARD
      • TOUGH COAT
      • STAIN & FINISHING OIL
      • FURNITURE WAXES
      • BEESWAX FINISH
      • HEMP OIL
      • GEL STAIN & TOP COAT
      • TUNG OIL

      Prep

      • ALL PREP
      • TSP ALTERNATIVE
      • ODOURLESS SOLVENT
      • ULTRA GRIP
      • TRANSITION
      • ALL PREP
      • TSP ALTERNATIVE
      • ODOURLESS SOLVENT
      • ULTRA GRIP
      • TRANSITION

      SWAG

      • ALL SWAG
      • GIFT CARD
      • APRONS
      • SELF-CARE
      • ALL SWAG
      • GIFT CARD
      • APRONS
      • SELF-CARE

      Get inspired by inspirational projects.

    • Colours
      • All Paint
      • ALCHEMY LIMESTONE & CHALK
      • MINERAL PAINT
      • METALLIC PAINT
      • MILK PAINT
      • SMOOTH PAINT WATER MISTER
      • COLOUR CARD & FAN DECKS
      • All Paint
      • ALCHEMY LIMESTONE & CHALK
      • MINERAL PAINT
      • METALLIC PAINT
      • MILK PAINT
      • SMOOTH PAINT WATER MISTER
      • COLOUR CARD & FAN DECKS
    • Inspiration
    • Learn
      • Prep
      • Apply
      • Top Coats
      • Choose A Brush
      • Techniques + Tips
      • Milk Paint How-To
      • Limewash Walls
      • Prep
      • Apply
      • Top Coats
      • Choose A Brush
      • Techniques + Tips
      • Milk Paint How-To
      • Limewash Walls
    • About
      • Meet the Creator
      • Become a Retailer
      • Become an Affiliate
      • Meet the Creator
      • Become a Retailer
      • Become an Affiliate

    COLOURS PROJECT TECHNIQUE

    DIY Stenciled Concrete Floor

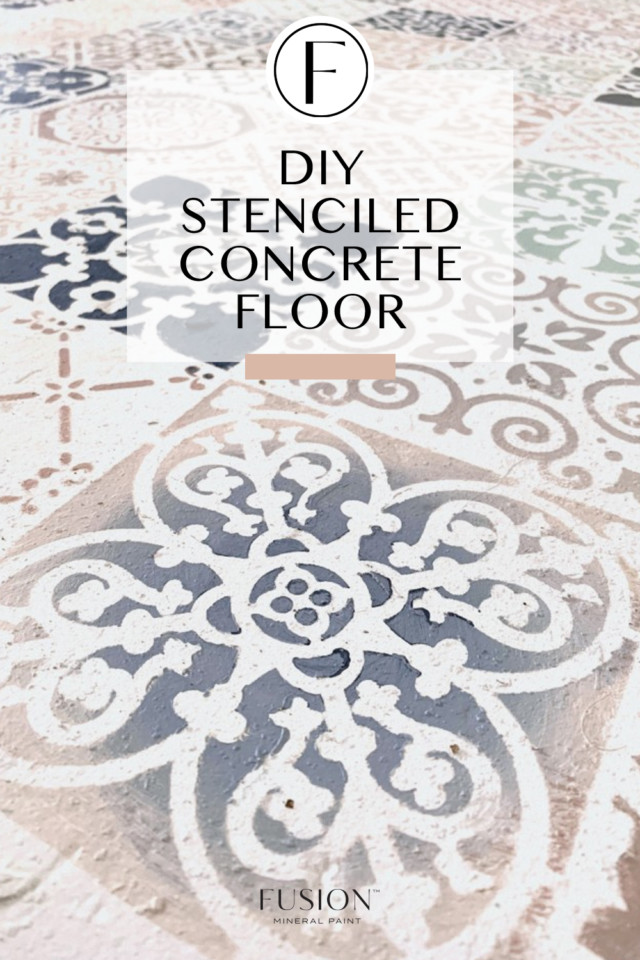
    We often tell people paint has the power to transform projects in such a way that after you’re done painting, you can’t believe it’s the same room or piece of furniture. In this case, we want to show you how we changed the look of an old concrete floor into something beautiful. We are sharing Jennylyn’s DIY Stenciled Concrete Floor that she recently did (and people went crazy for on Instagram when she shared it in our stories! Do you follow us there?). 

    stenciled concrete floor

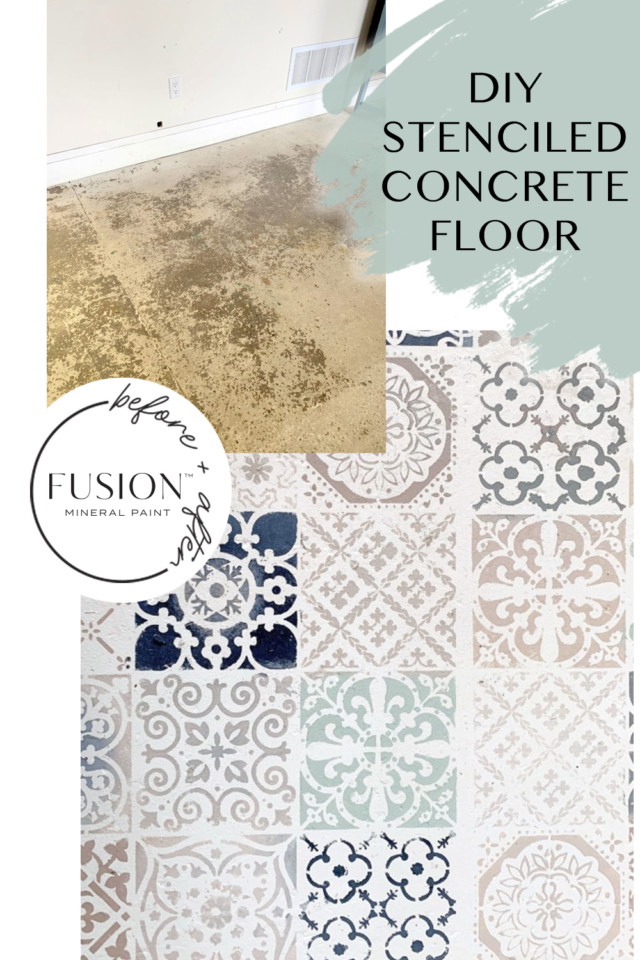
    We wanted to transform a space where we often take photos for staging and photography shoots – it was a concrete floor that had previously been painted with milk paint. So, we decided to stencil it to create a gorgeous new stencilled floor. This tutorial is going to teach you How to Stencil Concrete Floors with Fusion Mineral Paint. 

    For your DIY Stenciled Concrete Floor, you will need:

    • Fusion Mineral Paint in Raw Silk, Midnight Blue, Damask, Cathedral Taupe, Algonquin and Inglenook
    • Stencil from Re-Design with Prima
    • 3 Staalmeester Natural Bristle Brushes
    • Paper pallet or surface to mix and blend paint colors

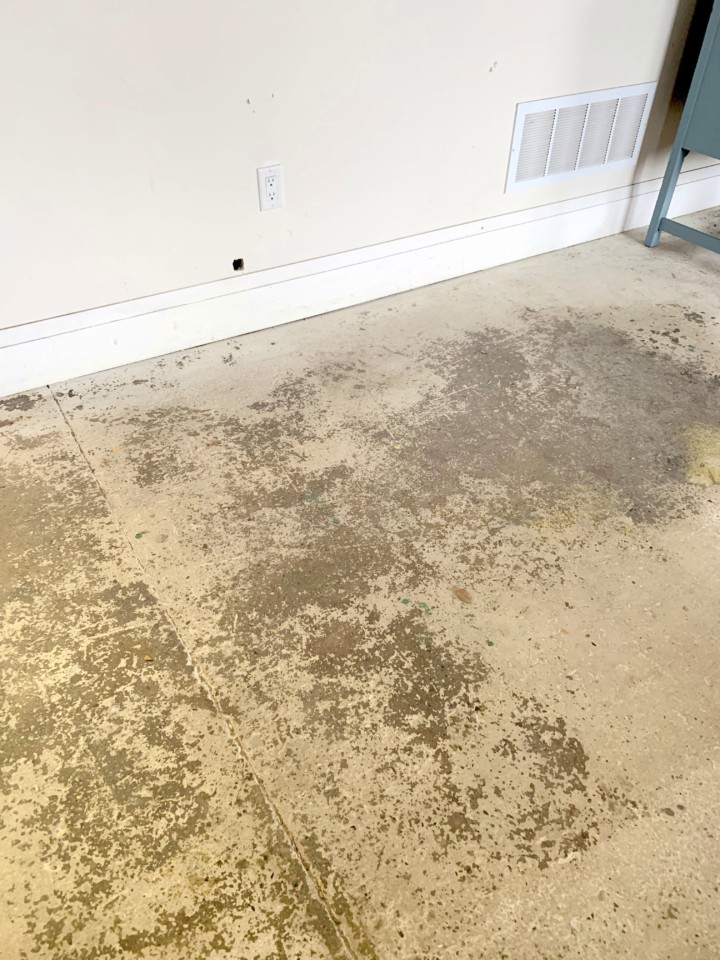
    STEP 1 – PREP YOUR FLOORS

    First, clean your floors. Sweep and wash your surface to make sure it is free from any debris.

    STEP 2 – PAINT BASE COAT/BASE COLOR

    Using a roller, roll out a coat of Raw Silk onto the floor and let dry, then follow up with a second coat. You do not need to use Ultra Grip before using Raw Silk to paint over concrete because concrete is porous and Fusion can soak in a bit. Hence why you’ll want to do two coats.

    STEP 3 – PREP CHOSEN COLORS FOR STENCIL

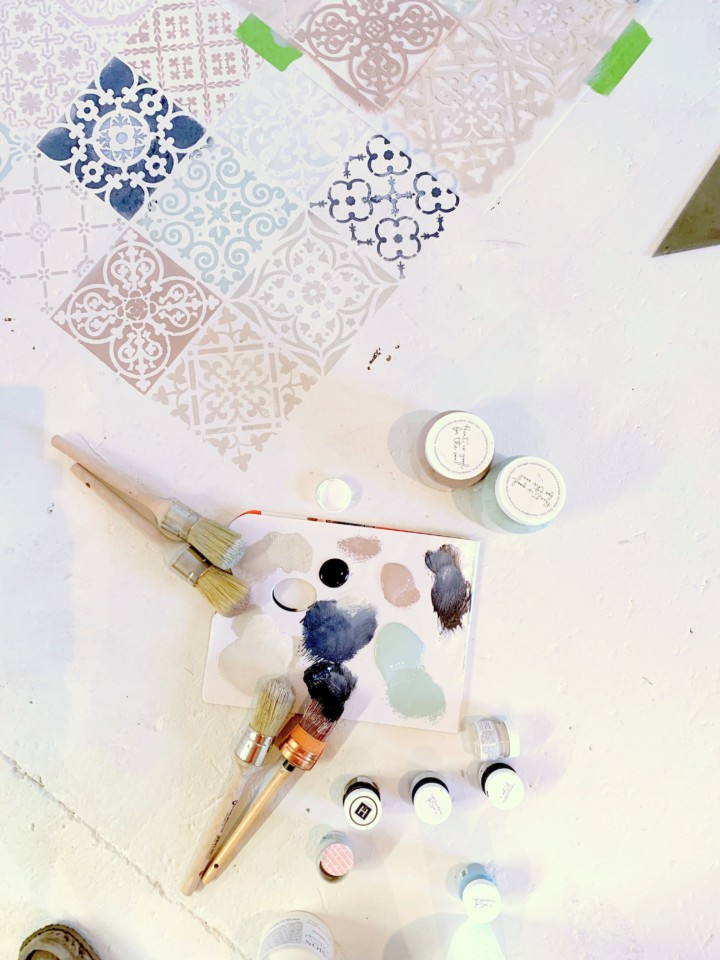
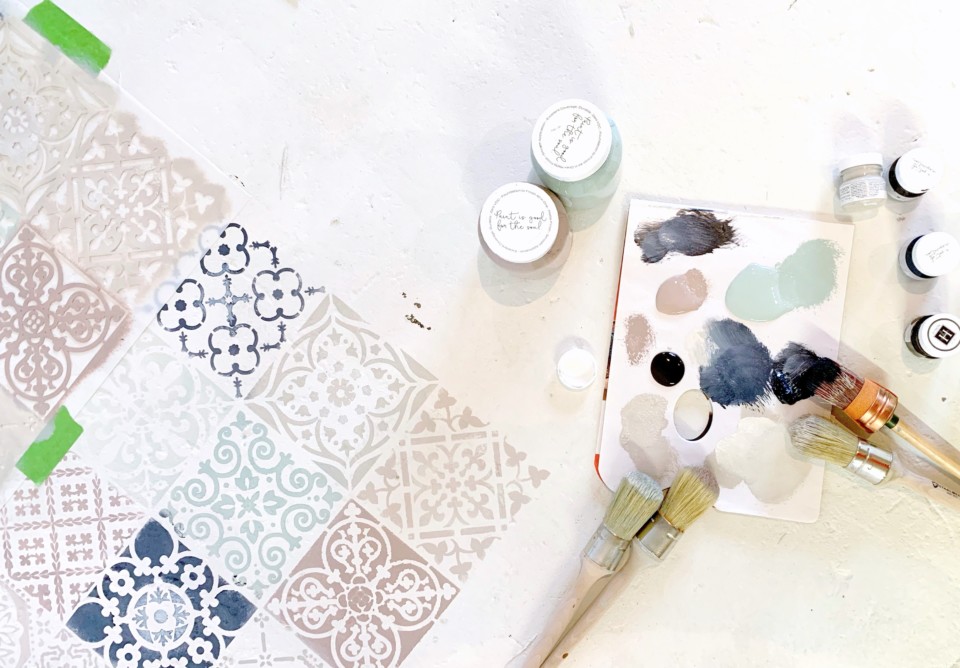
    Take all the Fusion Mineral paint colors and put them on a paper palette or surface of your choice, first in individual colors per section. You will be mixing them later so this is just an easier way to have the paint laid out ahead of time, and to avoid dirtying up your paint pots!

    STEP 4 – STENCIL TIPS 

    Align your stencil with the wall and tape it down securely so it stays in place. We recommend using a Staalmeester natural bristle brush. It holds paint very well and works better for stenciling than the synthetic blend brush because the natural bristles are a little stiffer than the synthetic blend brush. With a synthetic brush, the paint glides off really well – which is great when you’re painting a large surface, but not so great for stenciling, since you want to use minimal paint to avoid paint “bleeding” under the stencil.

    We used three different brushes for our DIY Stenciled Concrete Floor – one for dark paint, medium paint and the last one for light colors.

    Starting with the single color square stencil, put on a small amount of paint on a brush, just enough to cover the tips of the bristles. Then dab some of the paint onto a paper towel so that there is almost no paint left. The reason you want to do this is because too much paint can potentially cause smudging or bleeding. Afterwards, pounce (dab) or swirl to apply the paint over the stencil, doing a bit of a dry brush technique.

    STEP 5 – BLEND ADDITIONAL COLORS 

    For the additional colors, blend them by overlapping them on the squares or by dipping into two colors before applying the paint.

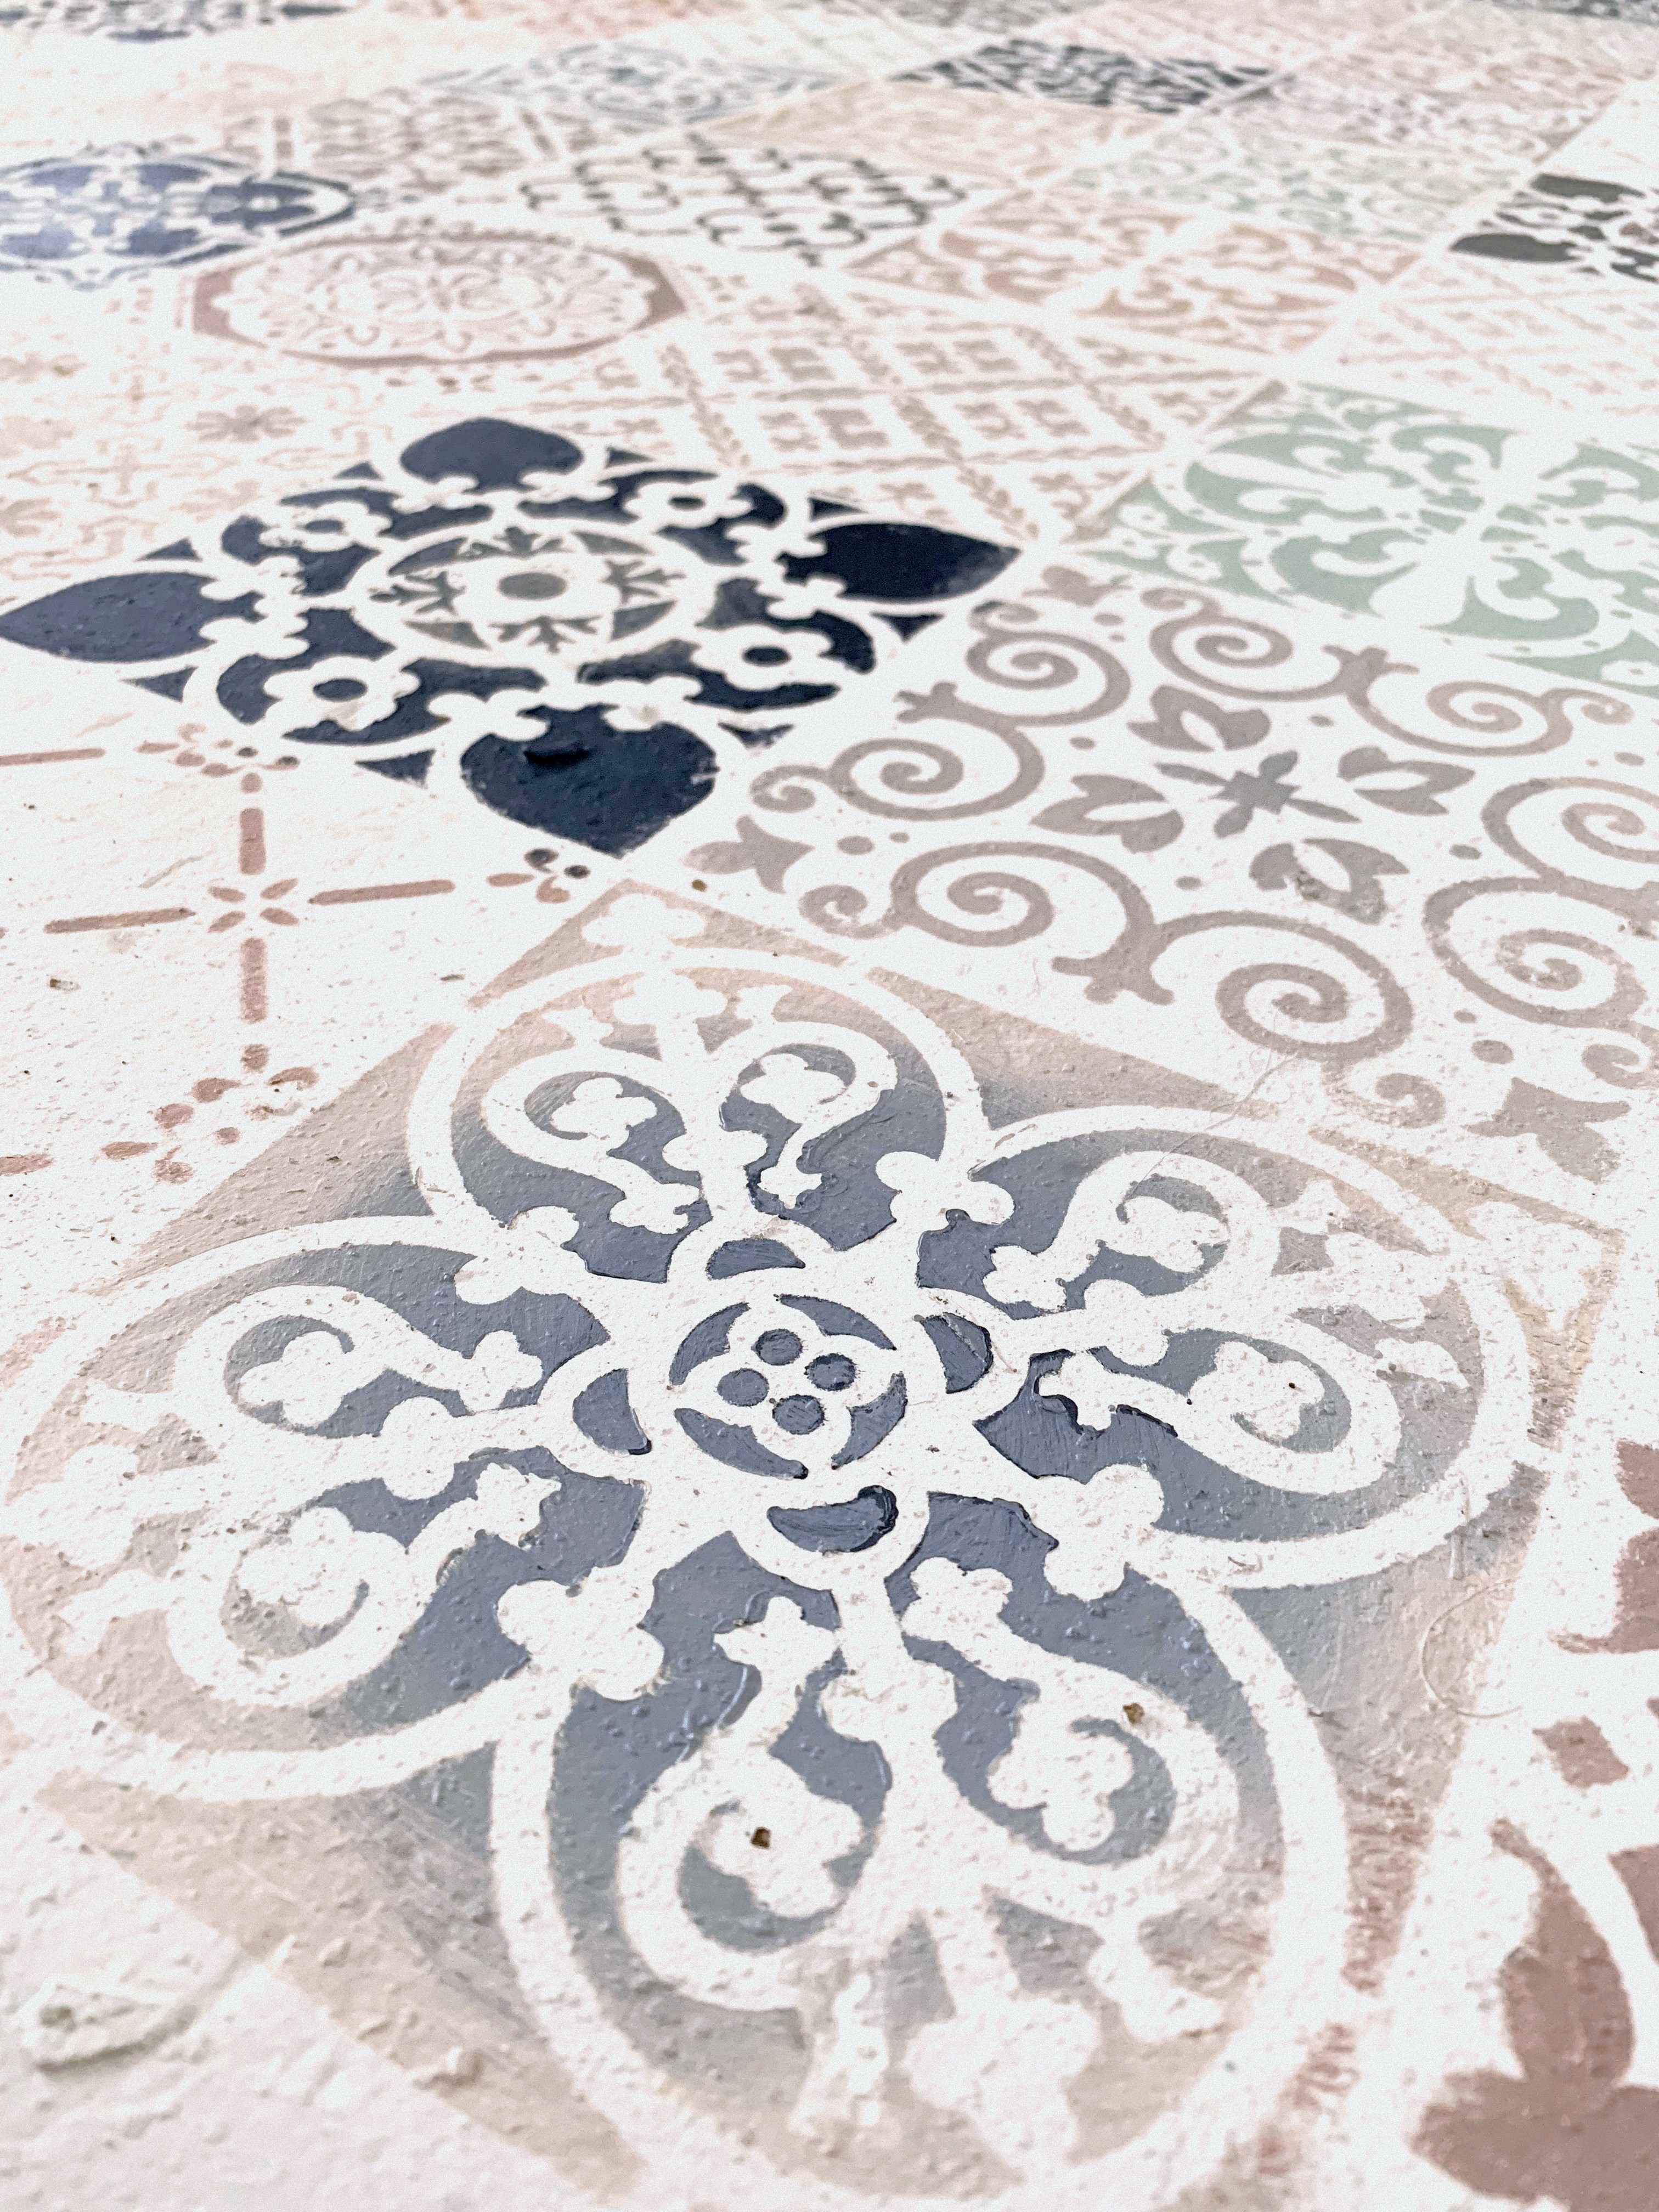
    We tried to be a touch random with colors but also were conscious of not having an large area of just light or dark paint and made sure not to have two of the same colored squares together.

    DIY Stenciled Concrete Floor

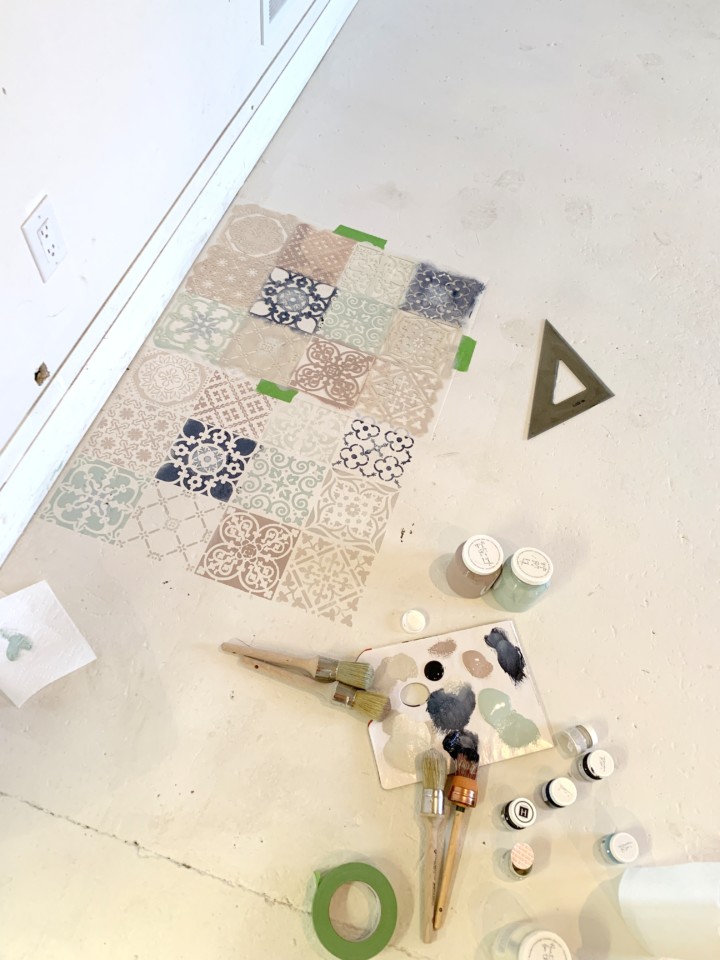
    STEP 5 – STENCIL PLACEMENT & TIPS

    Putting the stencil in the next location was a little tricky as we needed to keep the space between the “tiles” (the stencils) consistent. We recommend making “registration marks” which are little triangles at the edge of the stencil that help you line it up. For those that are unfamiliar with stencils, they sometimes have markings on them in the form of little arrows/triangles to help guide you on placement from one stencil to the next.. So if yours don’t have that, making your own is helpful for consistency. We also used a set square – a triangle measuring tool to help try and keep things straight and it worked pretty out well.

    STEP 6 – TOP COAT IF NEEDED 

    We did not add Tough Coat over this as for us it’s not a high traffic area and mostly used for staging photographs. If you, however, are doing a mud room floor or bathroom that is going to see a lot of water, you’ll definitely want a couple of layers of Tough Coat or some Stain and Finishing Oil in Natural to protect it.

    One thing to make note of for any newly painted floor, pools of water need to mopped up ASAP because if they’re left there, they could weaken the paint and lessen the durability. It does take three weeks for the paint to cure so do take care during this time.

    And there we have it! A gorgeous, DIY Stenciled Concrete Floor! Perfect for photo shoots or even a creative way for someone to brighten up an old environment.

    Have you ever stencilled or painted a floor? If you have we would love to see it so please do share it with us in our Paint it Beautiful Facebook group!

    PIN IT FOR LATER!

    stencilled floor with paint

    Previous Post
    -
    Next Post

    One Response

    1. Pingback: Painting a Bathroom Vanity • Fusion™ Mineral Paint
    • Instagram
    • Facebook
    • Youtube
    • TikTok
    • Pinterest

    fusion

    • Our story
    • BECOME AN AFFILIATE
    • BECOME A RETAILER
    • Retailer access

    customer service

    • Where to buy - Fusion Paint
    • Where to buy - Milk Paint
    • Shipping and Returns
    • Contact Us

    information

    • FAQ
    • paint safety & disclaimer
    • privacy policy

    © 2024 FUSION MINERAL PAINT.