
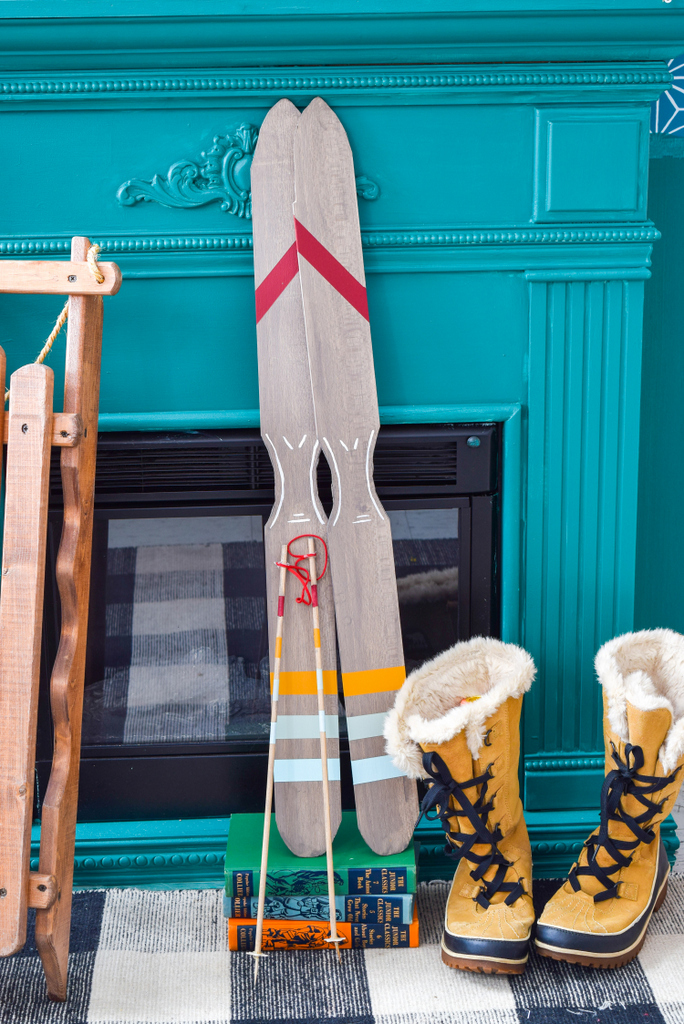
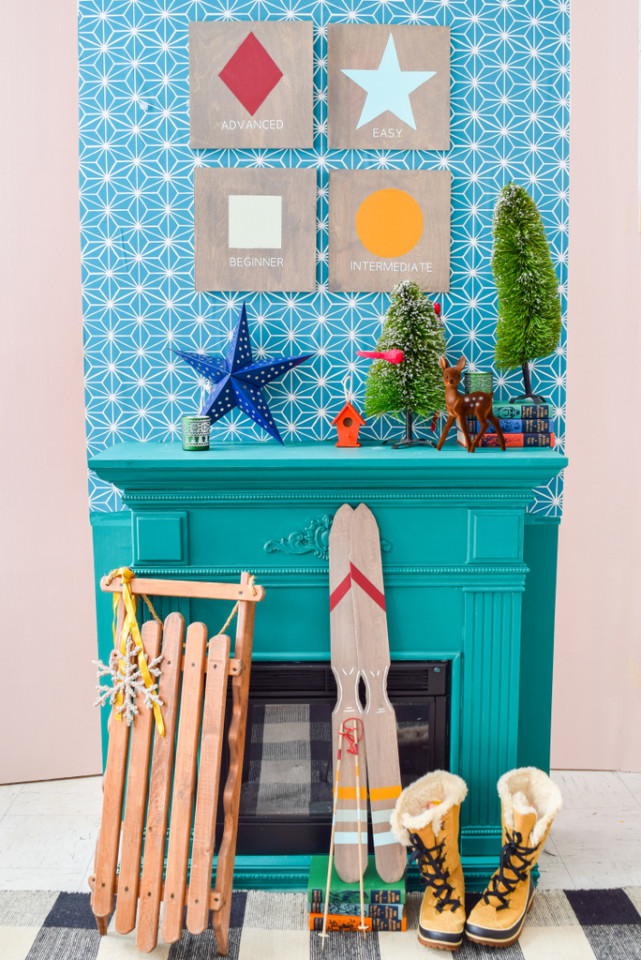
We made these DIY painted plywood skis (How to get the ski chalet look!) as part of our ski chalet craft decor series. Now, you don’t have to be into skiing to love the look of a vintage pair of skis leaning on the mantel or by the front door. Even for those of us who may not even know how to ski but love the whole ski chalet vibe, this project is for you! These DIY-painted plywood skis (How to get the ski chalet look!) are the perfect indoor activity, especially during the winter when the fire is roaring inside.
We always say, if you’re stuck in a rut during the winter months, there’s no better way to get out of it than to do a creative project that brings some joy into your home. We recently painted a gorgeous cabinet and even a fireplace mantel! And if you can make it look like a cozy ski chalet, why not? Using some crafting plywood, dowels, and paint and stain from Fusion, you can create a decorative set of small skis for your winter decor.
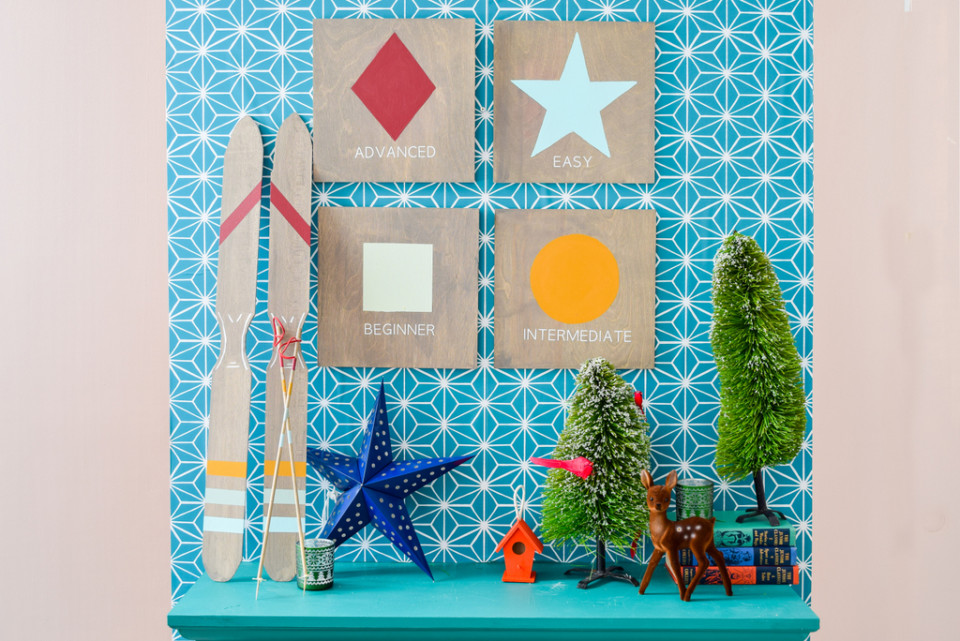
They’re the perfect complement to the ski chalet signs we made and would work great as Christmas decor as well. So what are you waiting for? Break out the paints, and the tape and let’s get started on these DIY Painted Plywood Skis (How to get the ski chalet look!).
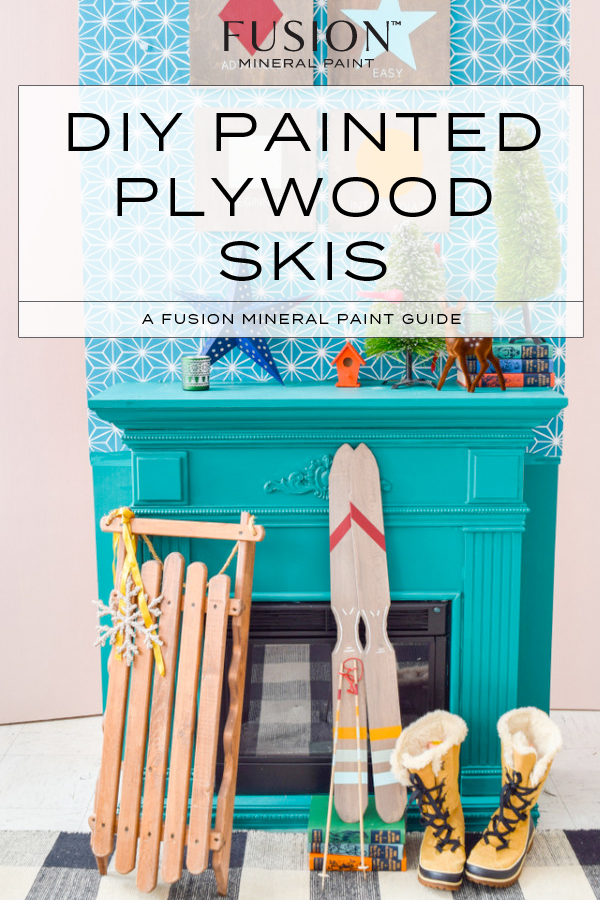
DIY Painted Plywood Skis (How to get the ski chalet look!)
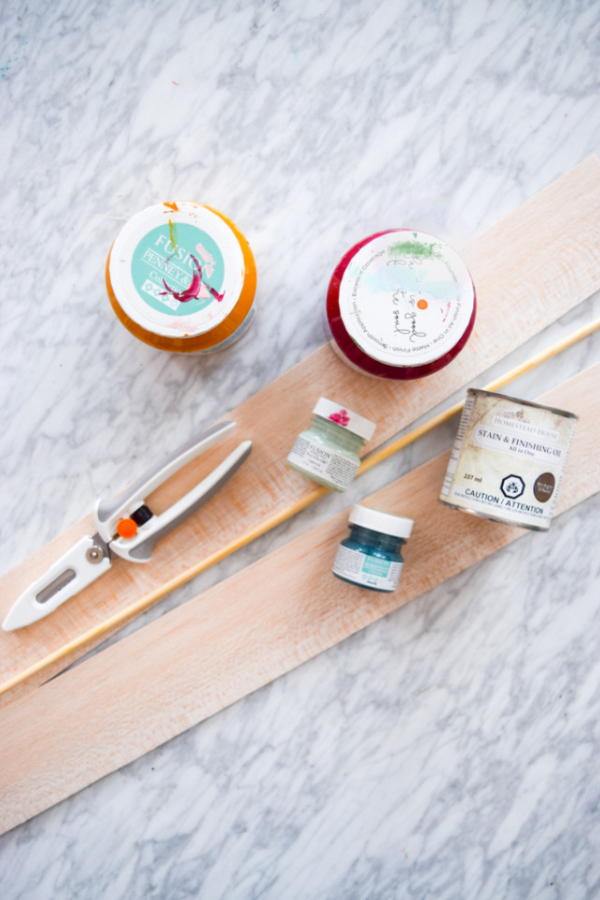
ITEMS NEEDED FOR THIS PROJECT:
- Fusion Mineral Paint in a variety of classic colors or colors to match your decor
- Crafting plywood (found at your local craft store )
- Dowels
- Wood stars
- Red strips of fabric or leather
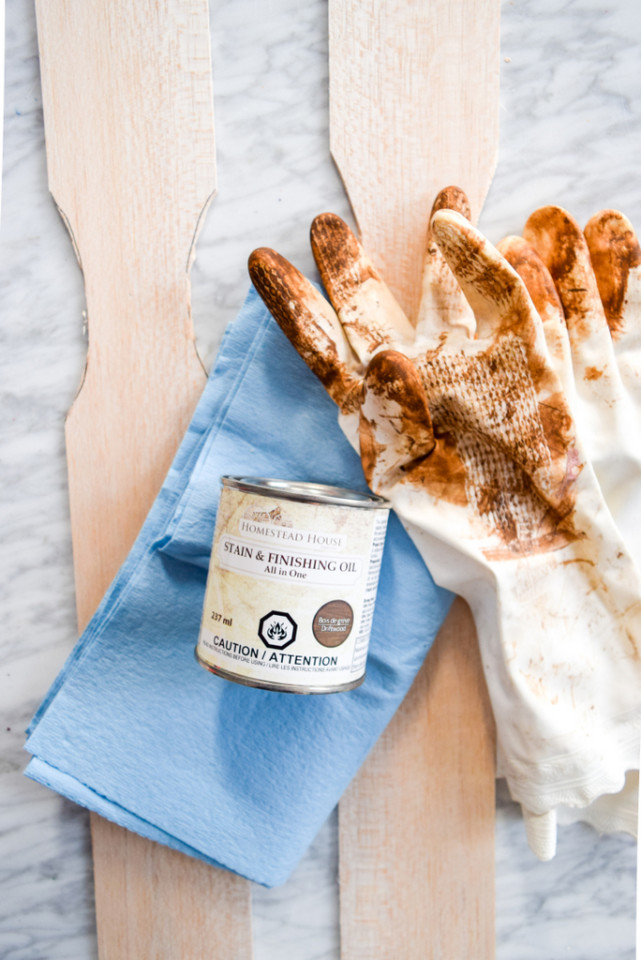
- Stain and Finishing Oil All in One
- Paint brushes
- Cloth for staining
- Gloves
- Pencil
- Crafting shears
STEP 1
CUT YOUR WOOD SKI SHAPE
In order to make these DIY Plywood Painted Skis (How to get the ski chalet look!), you will need crafting shears and a pencil to get started. Trace the outline of a ski on one piece of plywood. In abstract, it’s a rounded shape at the back, a pointed shape in the front and it tapers somewhere near the middle for the boot clip-ins.
Once you’ve cut one ski, use it to trace the outline on the other piece to ensure matching designs. Much like eyebrows, you want sisters not cousins.
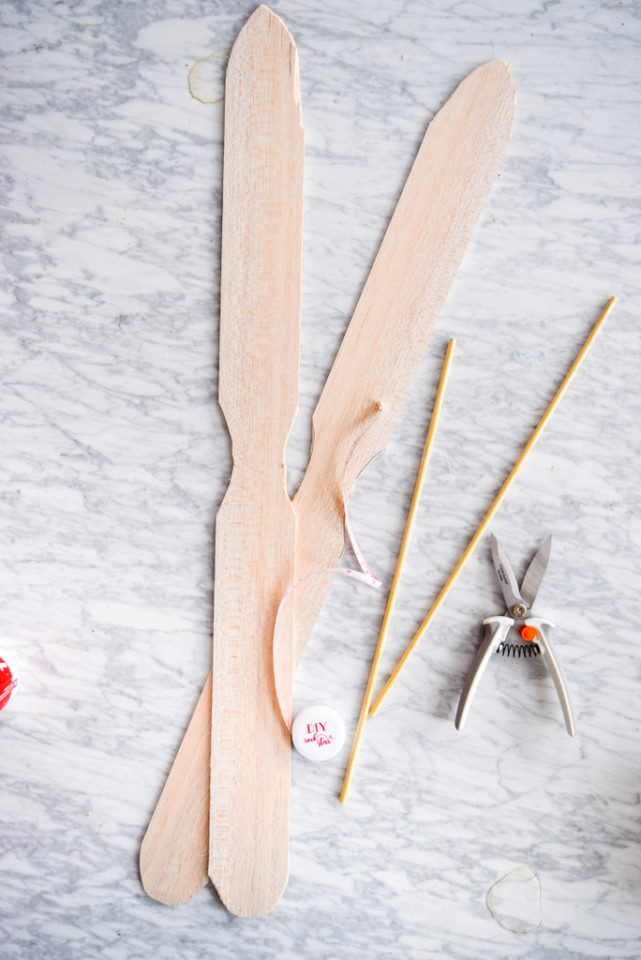
Because the crafting plywood is so thin, you can easily cut it using sheers. For anything like a 2”x 4” and thicker skis, you’ll need a scroll saw. So this up to you and your skill level.
STEP 2
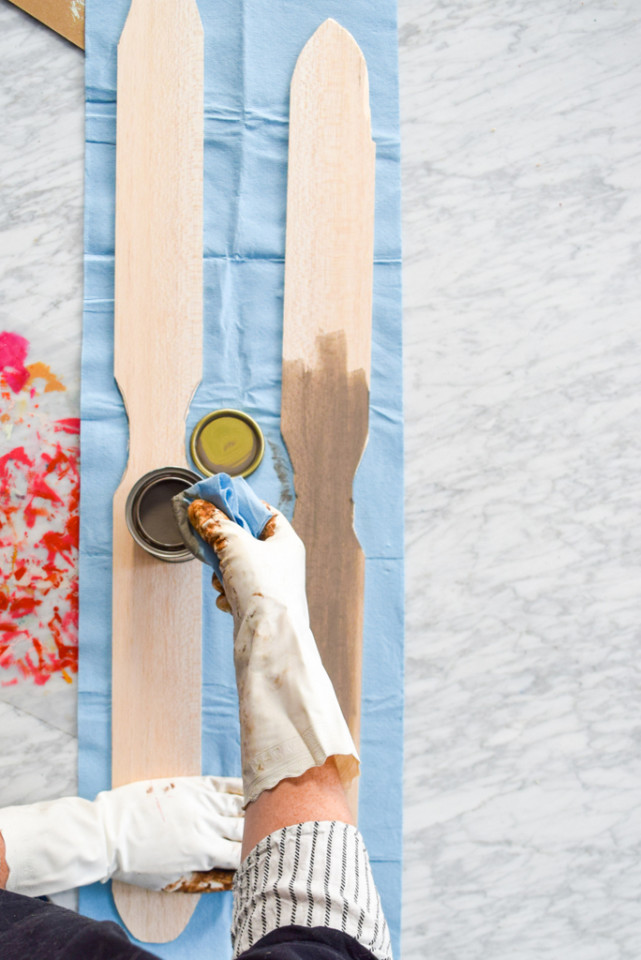
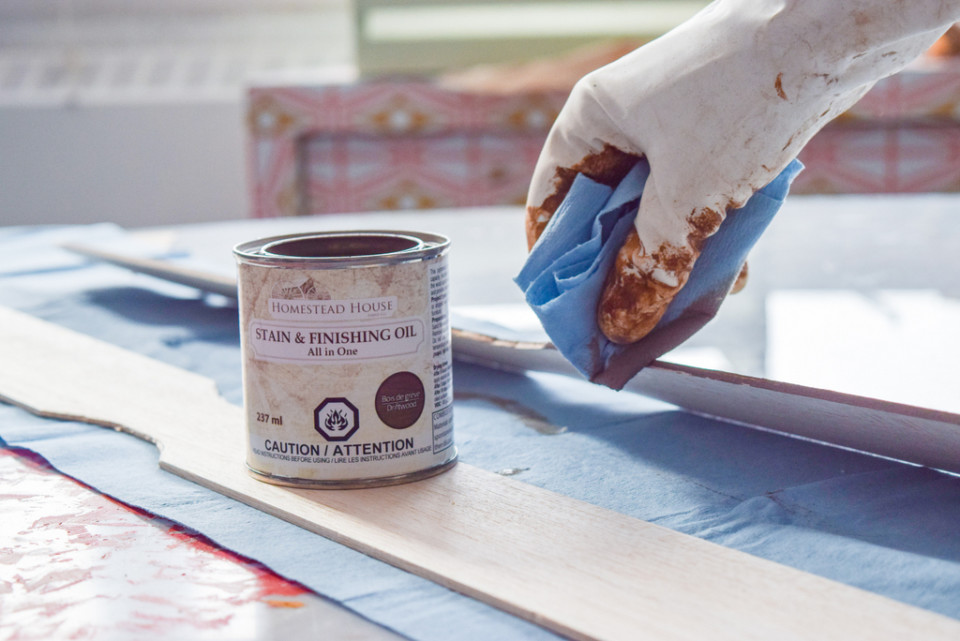
APPLY THE STAIN
Time to get out your Stain and Finishing Oil. We used the color Driftwood because it looks good against the other colors, matches the signs and has an appropriate amount of warmth to it. For this part you’ll need to use gloves, a staining rag and a surface to stain on (ideally one that’s protected). Using the staining rag, apply the Stain and Finishing Oil onto your surface. Make sure you allow for a full 12 hrs to dry, that way your painters tape will properly adhere. We repeat, make sure the surface is dry otherwise you won’t get the results you desire.
 STEP 3
 STEP 3
CREATE TAPE LINES
Using painters tape, create the design you want on each ski. We mirrored the design with stripes across each ski. For the skis, we used the classic Canadian HBC (Hudson’s Bay colors) of red, yellow, blue and green, as well as Cranberry, Mustard, Little Teapot and Inglenook. Feel free to use colors that you love and that suit your decor!
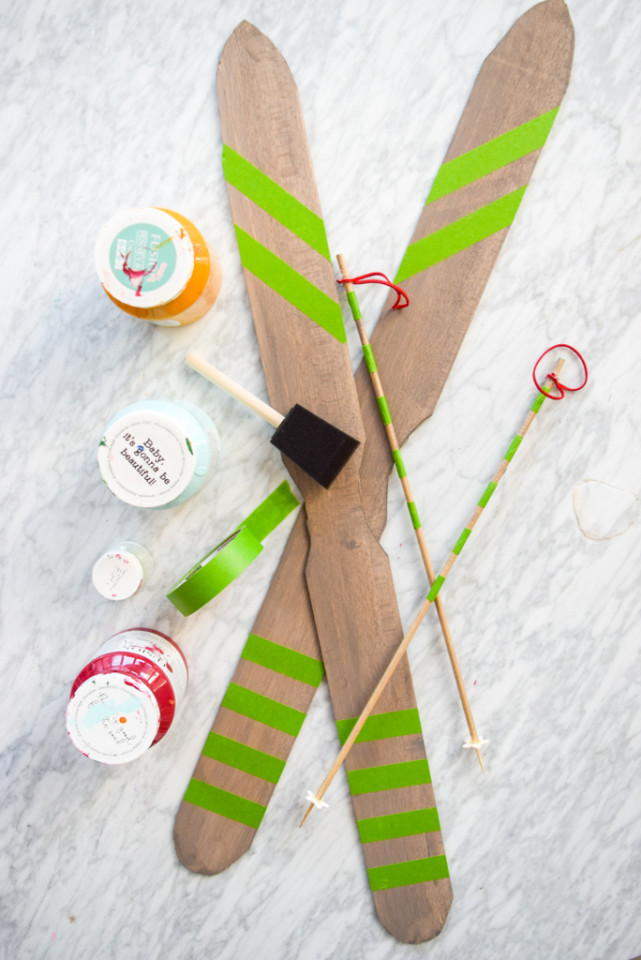
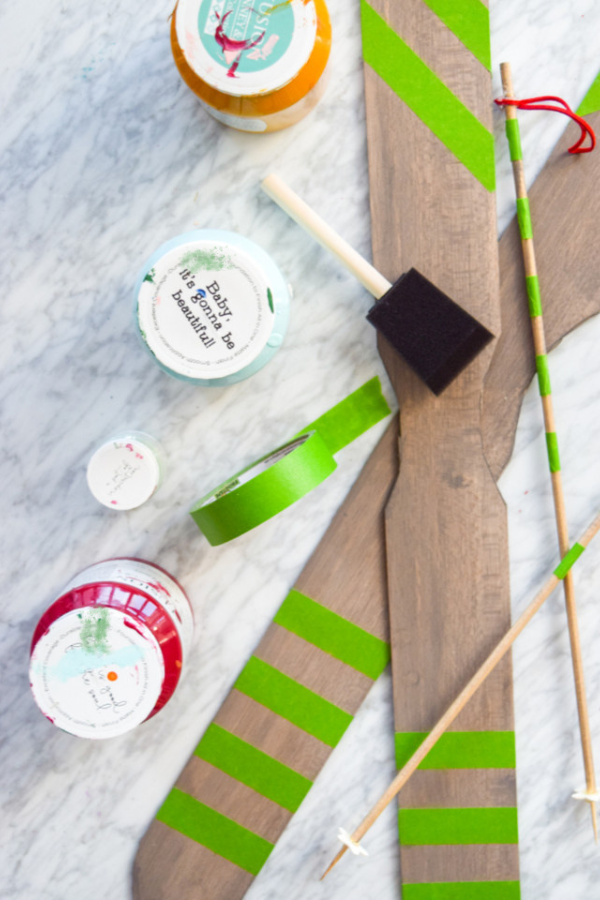
It only took two coats to ensure complete coverage, although one would have probably been OK.
STEP 4
MAKE SKI POLES
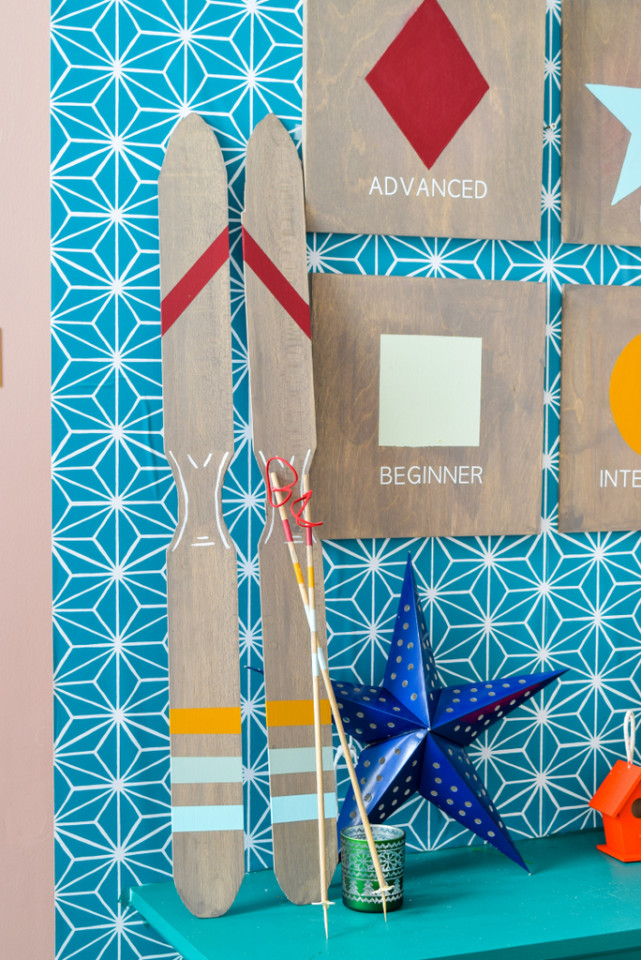
While all these were drying, we cut a dowel in half to serve as ski poles, then stained it using the same Stain and Finishing Oil (Driftwood) as we used on the skis. To make the decorative ends of each ski pole, we used a star-shaped die cut and half a toothpick. Hot glue worked its magic and suddenly we had fully formed ski poles. For the wrist attachment, we used some red leather cord cut to appropriately sized loops.
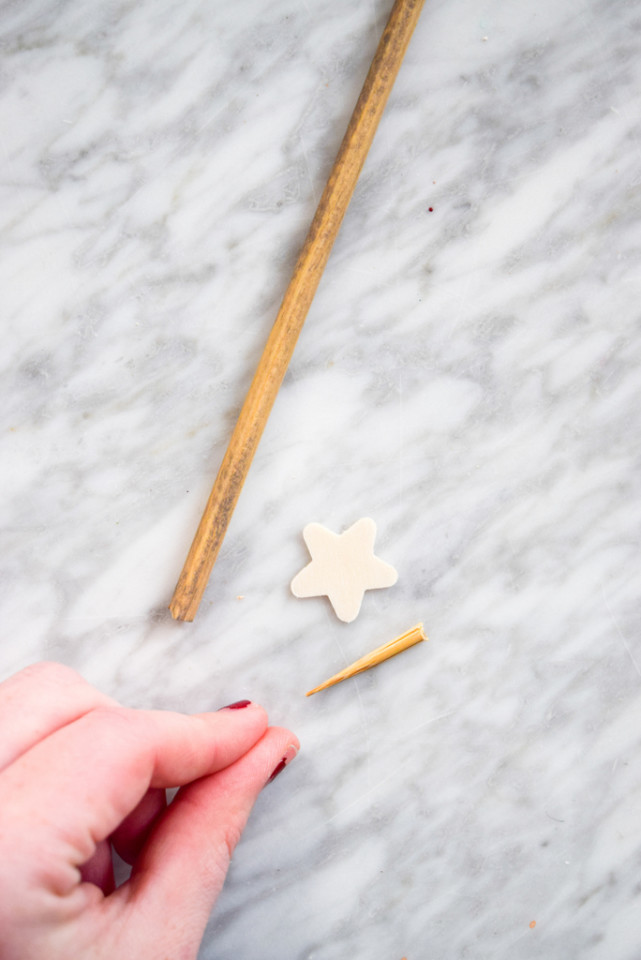
Much like the skis, colors and patterns along the ski poles mirrored each other.
Once the skis were dry, I used a fine-tip brush and some white paint to add little details like where the boots would clip in. You could easily leave this part blank though.
STEP 5
Time to decorate! You could tie them up with a ribbon, lean them against the wall, or incorporate them into a seasonal tablescape. It’s up to you! But we think they make an amazing addition to our Ski Signs and fireplace mantel for a fresh and bright ski chalet look.

So what do you think of our DIY Painted Plywood Skis (How to get the ski chalet look!) Do you think you’ll make your own set? If you do, let us know! We always love to see your decor and craft projects!
PIN IT FOR LATER!
One Response